


Taskeng.exe is a legit Windows process that runs the Task Scheduler Engine program. Task Scheduler Engine is responsible for running automatically specified process at pre-defined times. Unfortunately, like other well-known Windows files like svchost.exe, taskeng.exe is also used as a disguise of malicious files created by cyber criminals. So a blank black box pop up that shows an error and appears randomly can be a sign of taskeng.exe virus infection as the natural behavior of the process doesn’t imply popping up of any windows on the desktop. A malware infection disguised as taskeng.exe Windows process can cause various security issues like data theft, disrupted PC and browser functioning and even additional malware attacks.
Taskeng.exe –Virus File vs. Safe Microsoft Windows Process?
The pop-up error associated with taskeng.exe process may be part of various malware infection scenarios. In most of the cases, the tasking.exe pop-up appears because of annoying adware or browser hijacker that has infected the PC. Some reports of infected users reveal that Conduit Search browser hijacker may cause the error. Such potentially unwanted software is usually ad-supported which can slow down the infected PC and violet browser performance. Furthermore, taskeng.exe virus is able to record keyboard and mouse inputs. Gathered information can be sent to a server controlled by hackers.
The taskeng.exe virus can serve cyber criminals as a backdoor access that allows them to drop additional malware on the computer. Once the virus is running on the system, it can ensure its sustainable presence on the infected host by modifying Windows Registry keys like Run and RunOnce and adding custom values.
HKEY_LOCAL_MACHINE\Software\Microsoft\Windows\CurrentVersion\Run
HKEY_LOCAL_MACHINE\Software\Microsoft\Windows\CurrentVersion\RunOnce
HKEY_CURRENT_USER\Software\Microsoft\Windows\CurrentVersion\Run
HKEY_CURRENT_USER\Software\Microsoft\Windows\CurrentVersion\RunOnce
These keys control all apps that start automatically each time the Windows is switched on.
As we mentioned in the beginning, essentially taskeng.exe belongs to Microsoft Windows Operating System process Task Scheduler Engine. The technical characteristics of the original taskeng.exe file that is a safe Microsoft Windows system process may help you to differentiate it from a process with the same file name dropped by malware program. The original Microsoft taskeng.exe is:
– Located in the C:\Windows\System32 folder
– 192,000 bytes (49% of all occurrences), 169,472 bytes and 171,520 bytes, 169,984 bytes, 166,400 bytes, 237,568 bytes, 359,936 bytes, 190,464 bytes, 240,640 bytes, 239,616 bytes, 356,352 bytes, 355,328 bytes, 388,608 bytes, 192,512 bytes or 924,632 bytes by size depending on the Windows OS version
– Not visible
– With available description of the program
Any discrepancy with this information is a signal of a taskeng.exe virus on the computer that should be terminated as soon as possible.
Remove Taskeng.exe Virus and Restore Your PC
WARNING! Manual removal of the Taskeng.exe virus requires being familiar with system files and registries. Removing important data accidentally can lead to permanent system damage. If you don’t feel comfortable with manual instructions, download a powerful anti-malware tool that will scan your system for malware and clean it safely for you.
SpyHunter anti-malware tool will diagnose all current threats on the computer. By purchasing the full version, you will be able to remove all malware threats instantly. Additional information about SpyHunter / Help to uninstall SpyHunter
Taskeng.exe Virus – Manual Removal Steps
Start the PC in Safe Mode with Network
This will isolate all files and objects created by the ransomware so they will be removed efficiently. The steps bellow are applicable to all Windows versions.
1. Hit the WIN Key + R
2. A Run window will appear. In it, write msconfig and then press Enter
3. A Configuration box shall appear. In it Choose the tab named Boot
4. Mark Safe Boot option and then go to Network under it to tick it too
5. Apply -> OK
Remove Taskeng.exe from Windows
Here’s a way to remove the program. This method will work regardless if you’re on Windows 10, 8, 7, Vista or XP. Simply selecting the program and pressing delete won’t work, as it’ll leave a lot of small files. That’s bad because these leftovers can linger on and cause all sorts of problems. The best way to delete a program is to uninstall it. Here’s how you can do that:
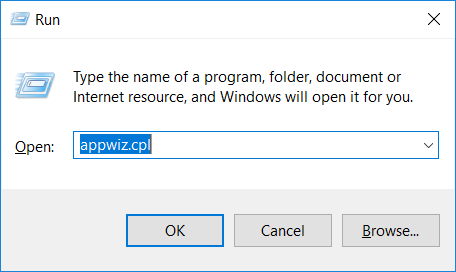
1. Hold the “Windows” button (It’s between CTRL and Alt on most keyboards) and press “R”. You’ll see a pop-up window.
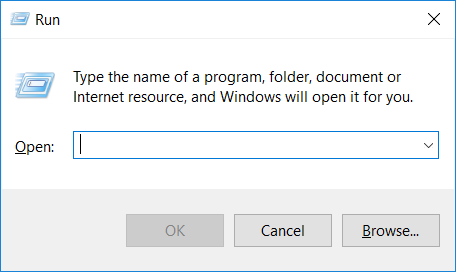
2. In the textbox, type “appwiz.cpl”, then press“ Enter ”.
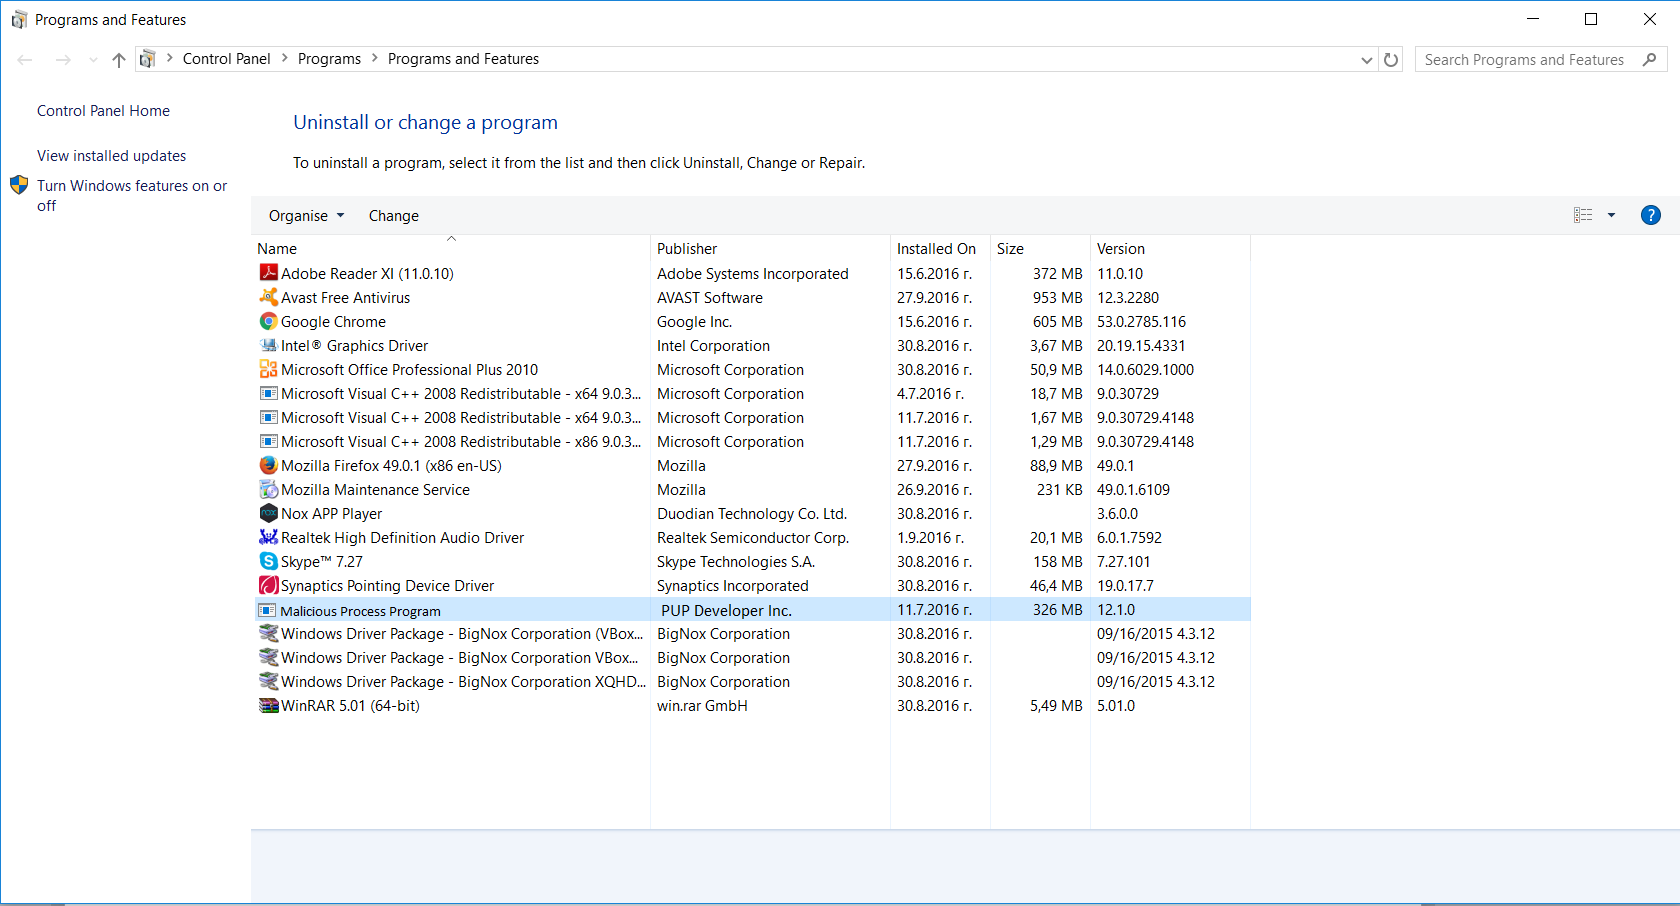
3. The “Programs and features” menu should now appear. It’s a list of all the programs installed on the PC. Here you can find the program, select it, and press “Uninstall“.
Remove Taskeng.exe Virus From Your Browser
Before resetting your browser’s settings, you should know that this action will wipe out all your recorded usernames, passwords, and other types of data. Make sure to save them in some way.
-
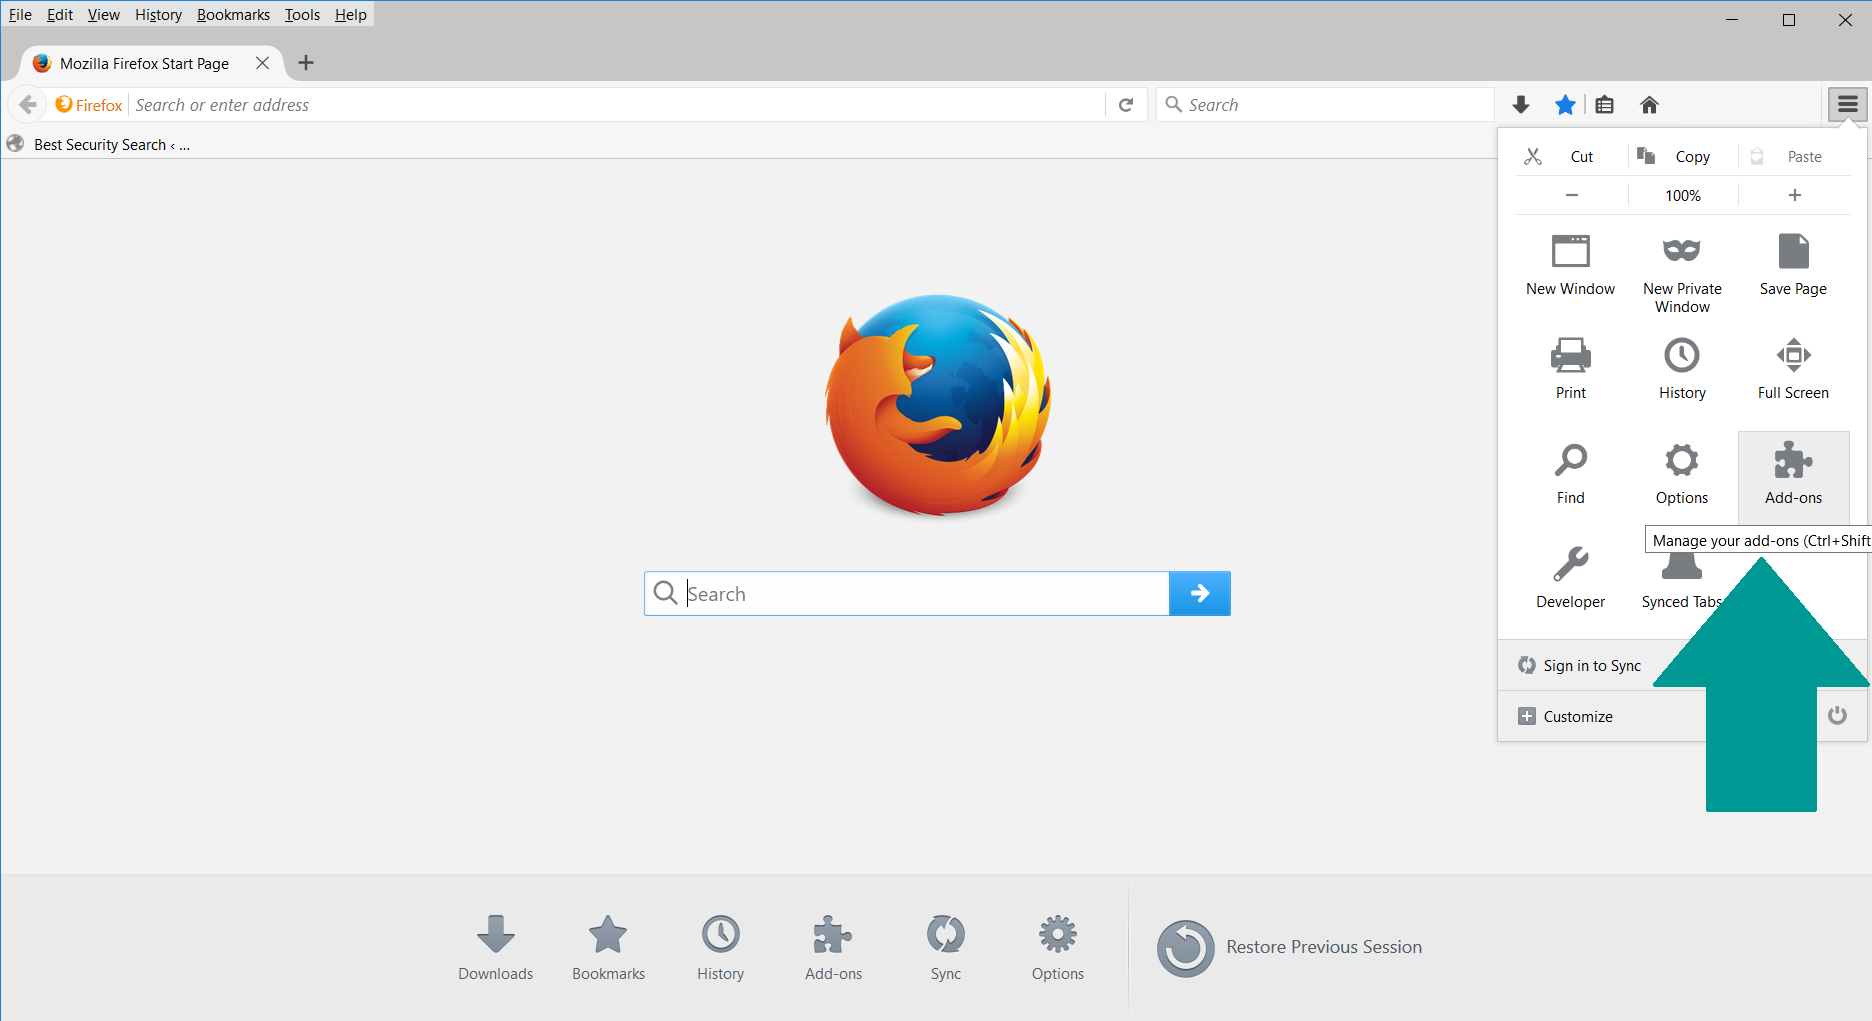
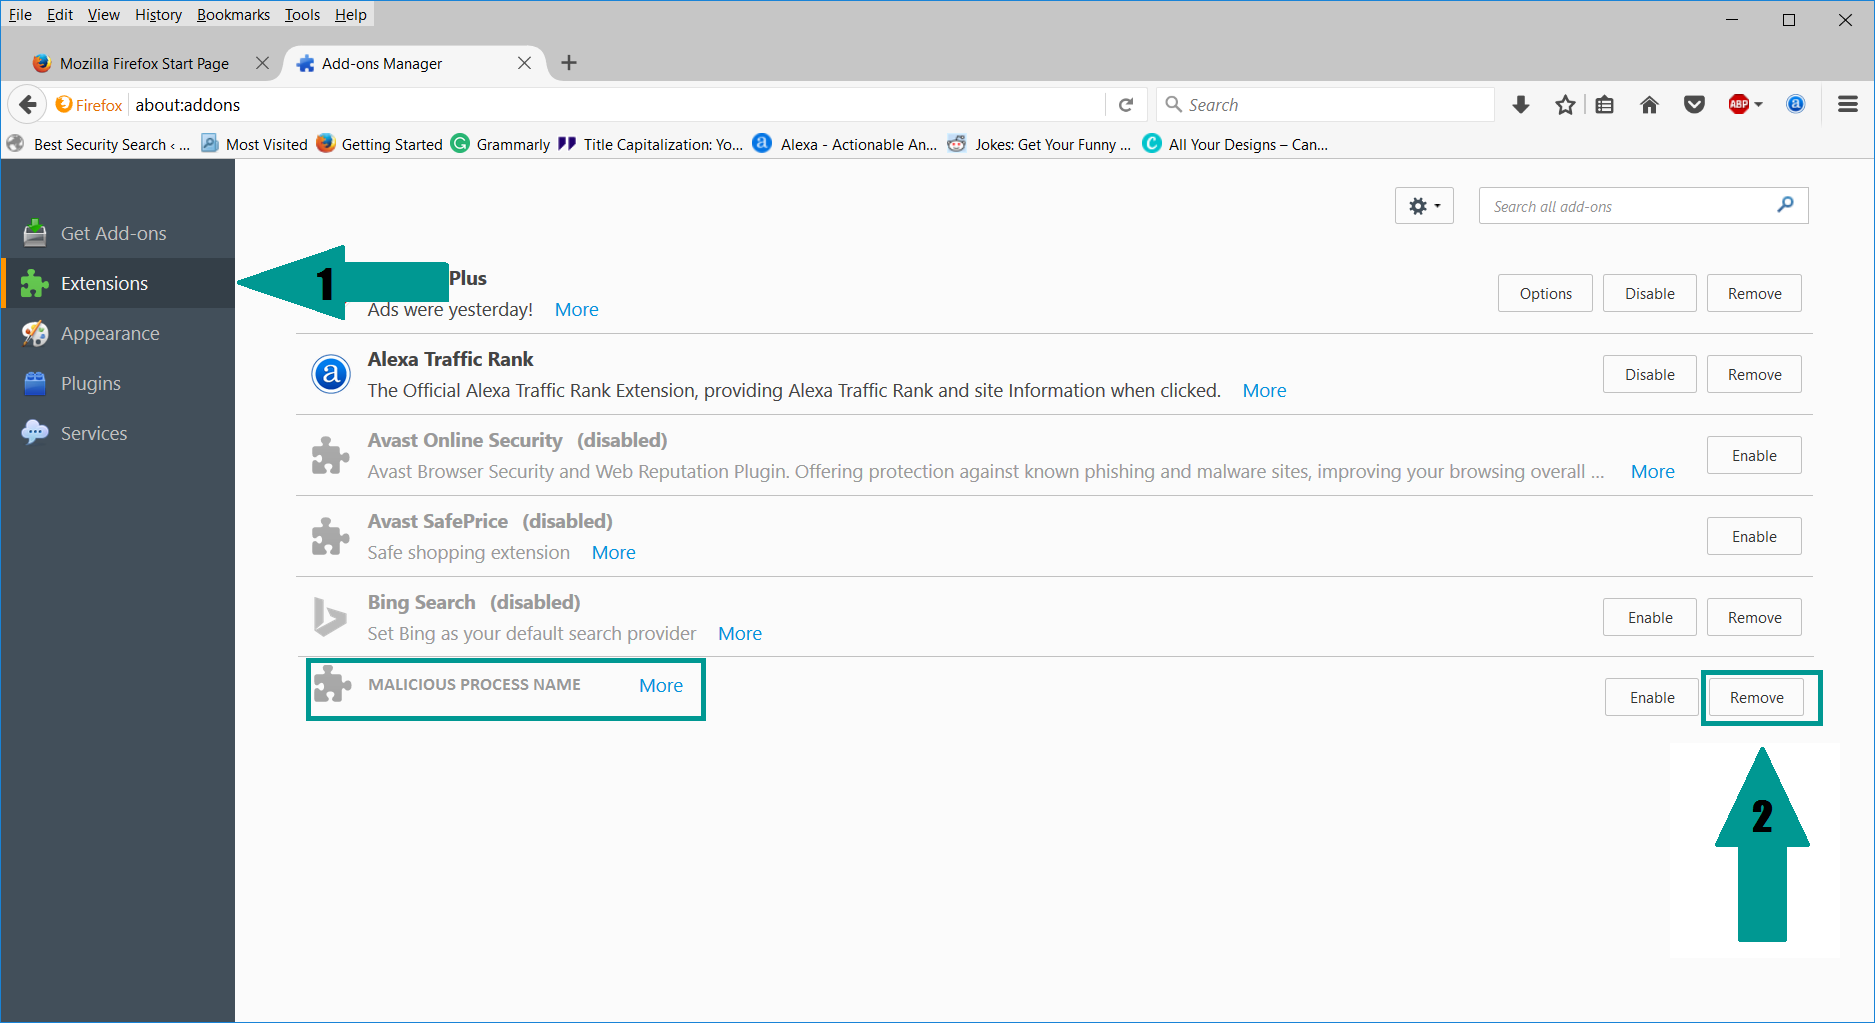
1. Start Mozilla Firefox. In the upper right corner, click on the Open menu icon and select “Add-ons“.
2. Inside the Add-ons Manager select “Extensions“. Search the list of extensions for suspicious entries. If you find any, select them and click “Remove“.
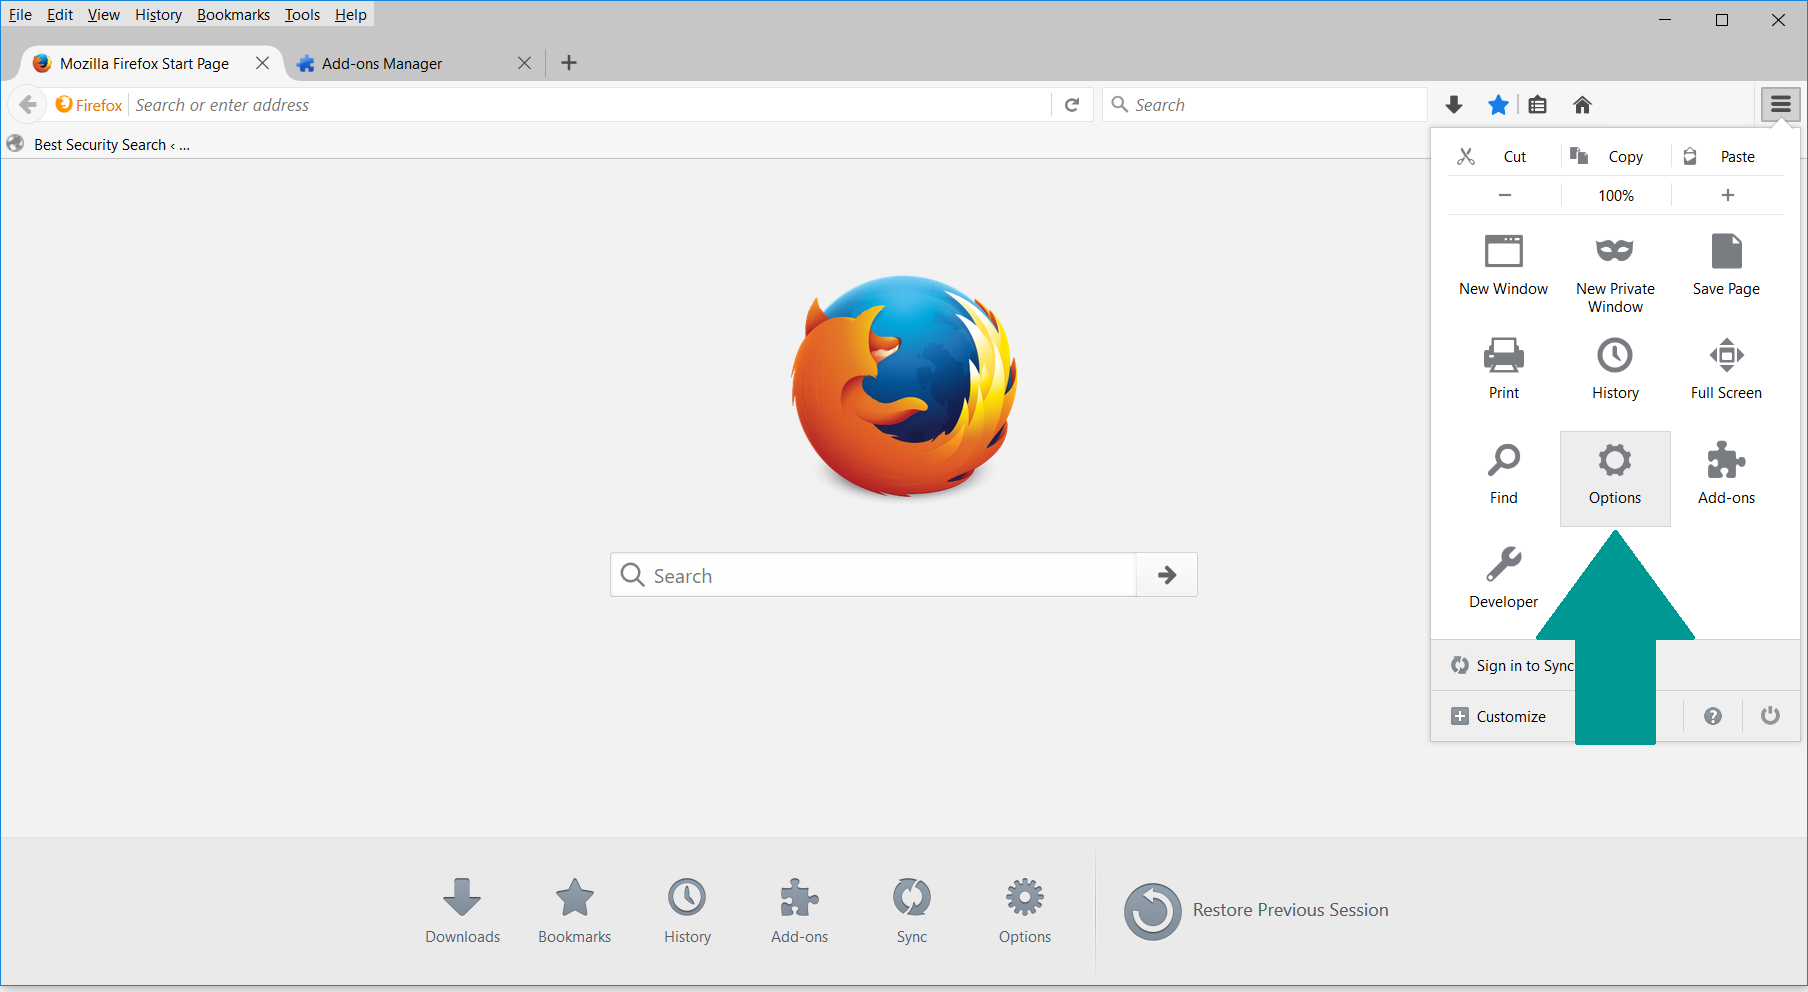
3. Click again on the Open menu icon, then click “Options“.
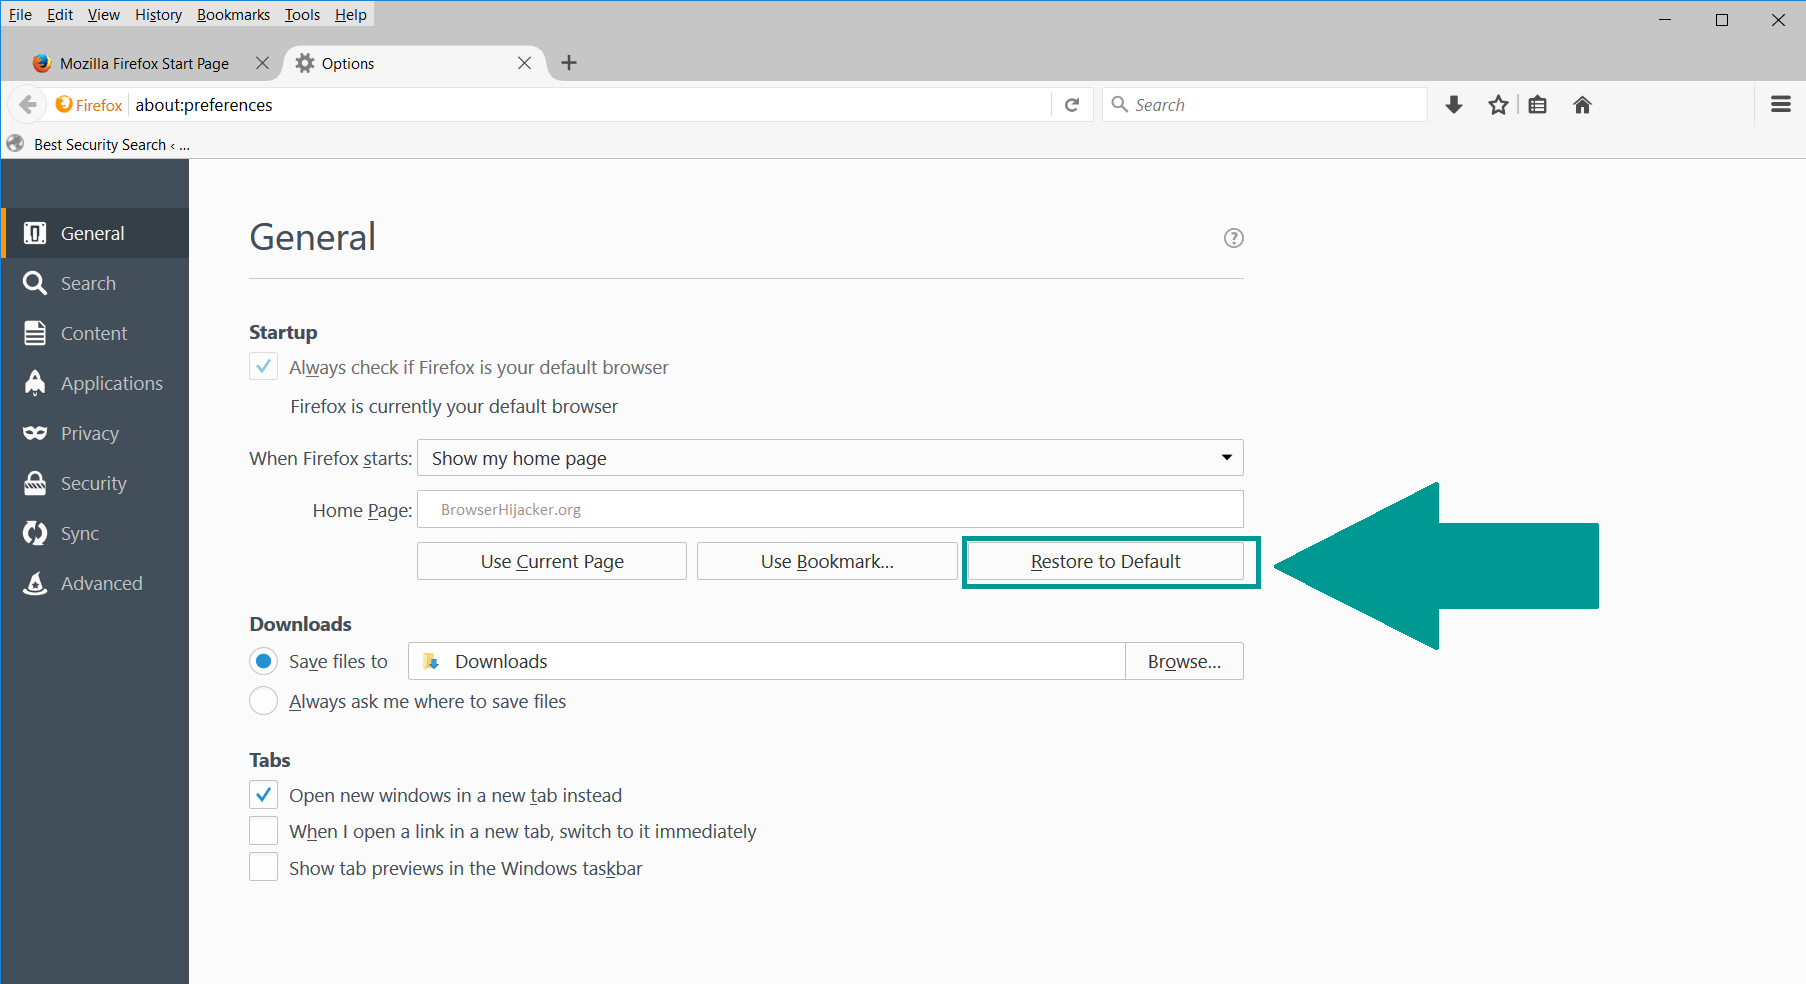
4. In the Options window, under “General” tab, click “Restore to Default“.
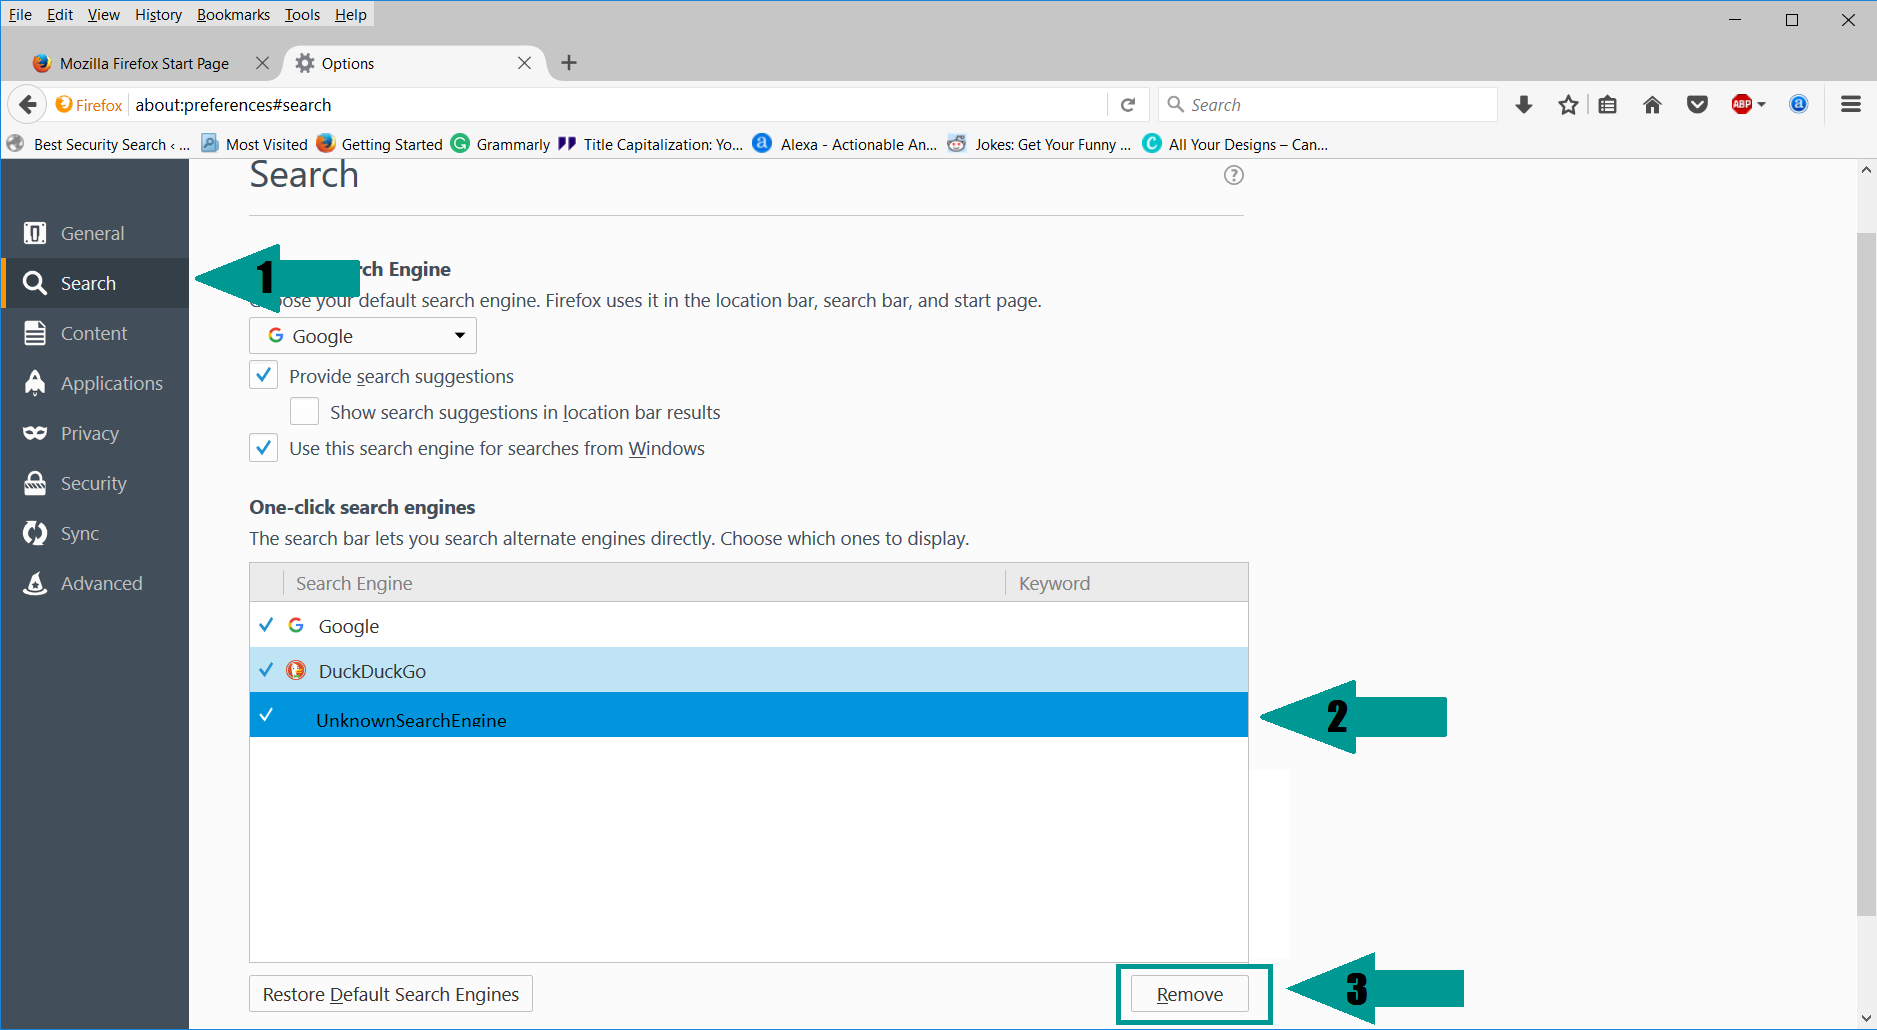
5. Select “Search” in the left menu, mark the unknown search engine and press “Remove”.
-
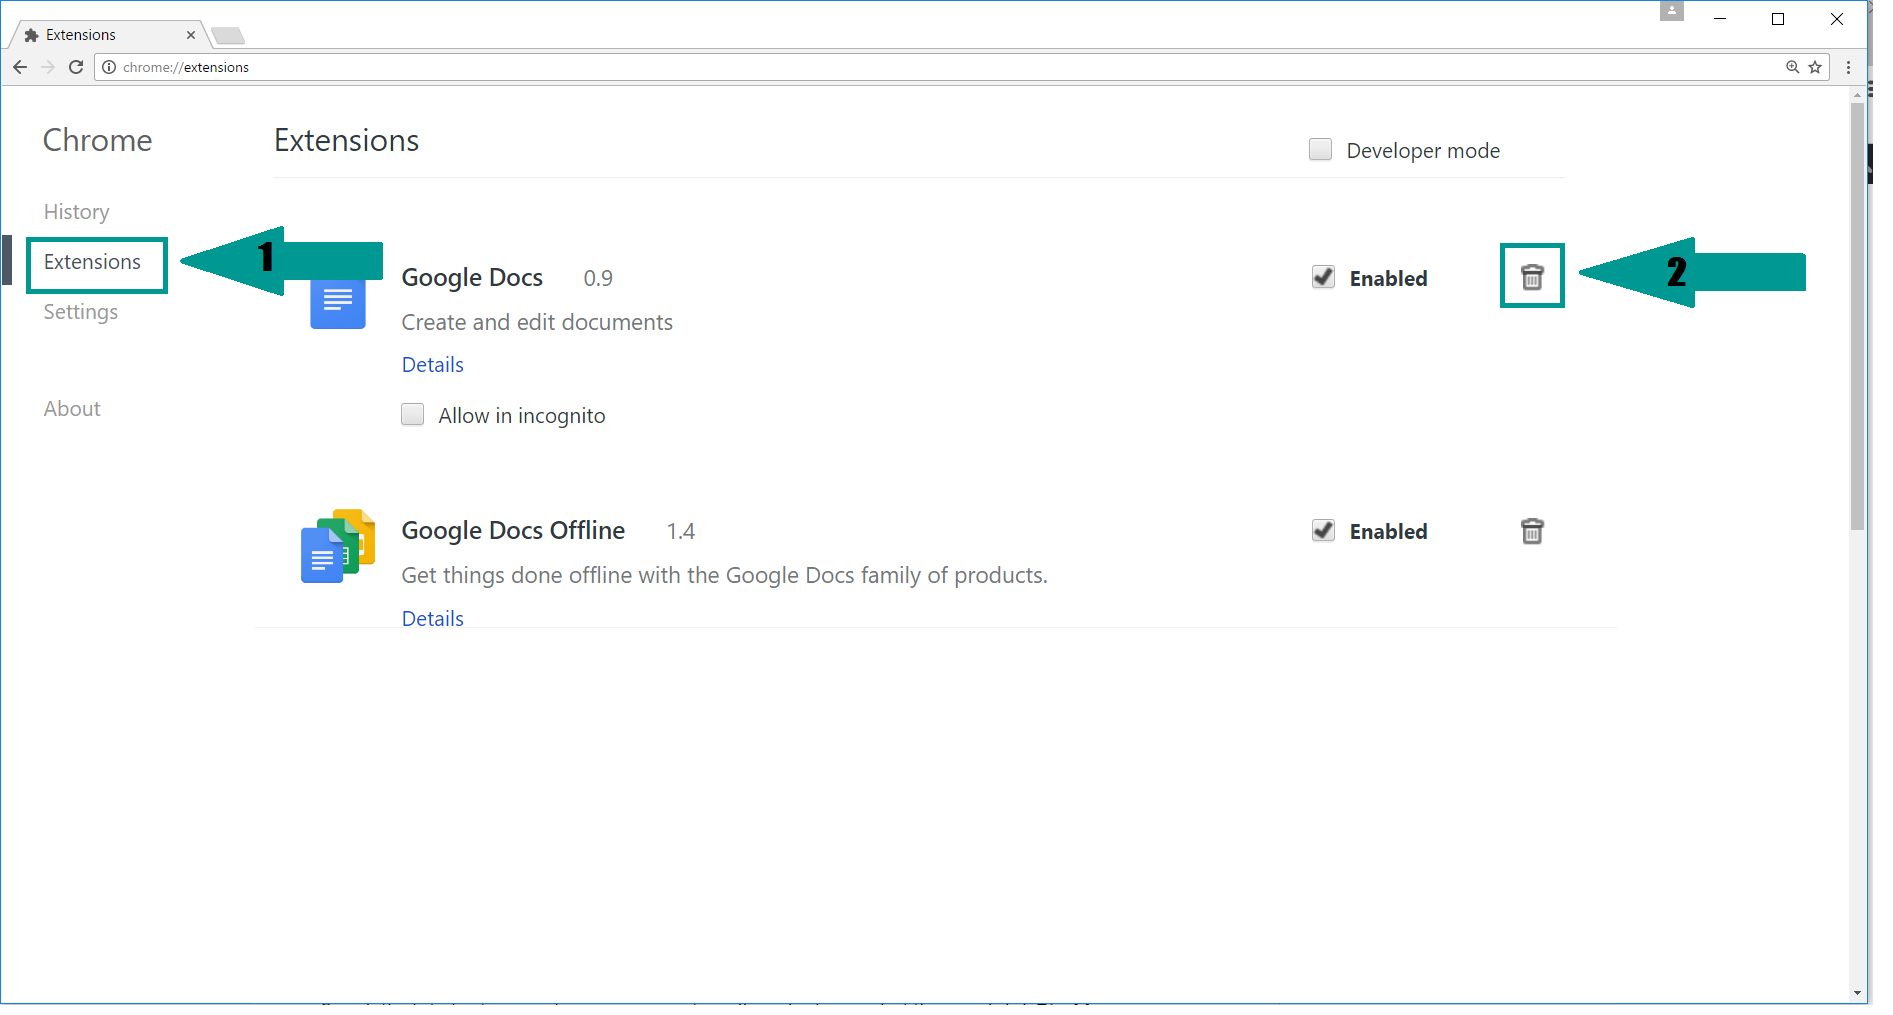
1. Start Google Chrome. On the upper-right corner, there a “Customize and Control” menu icon. Click on it, then click on “Settings“.

2. Click “Extensions” in the left menu. Then click on the trash bin icon to remove the suspicious extension.
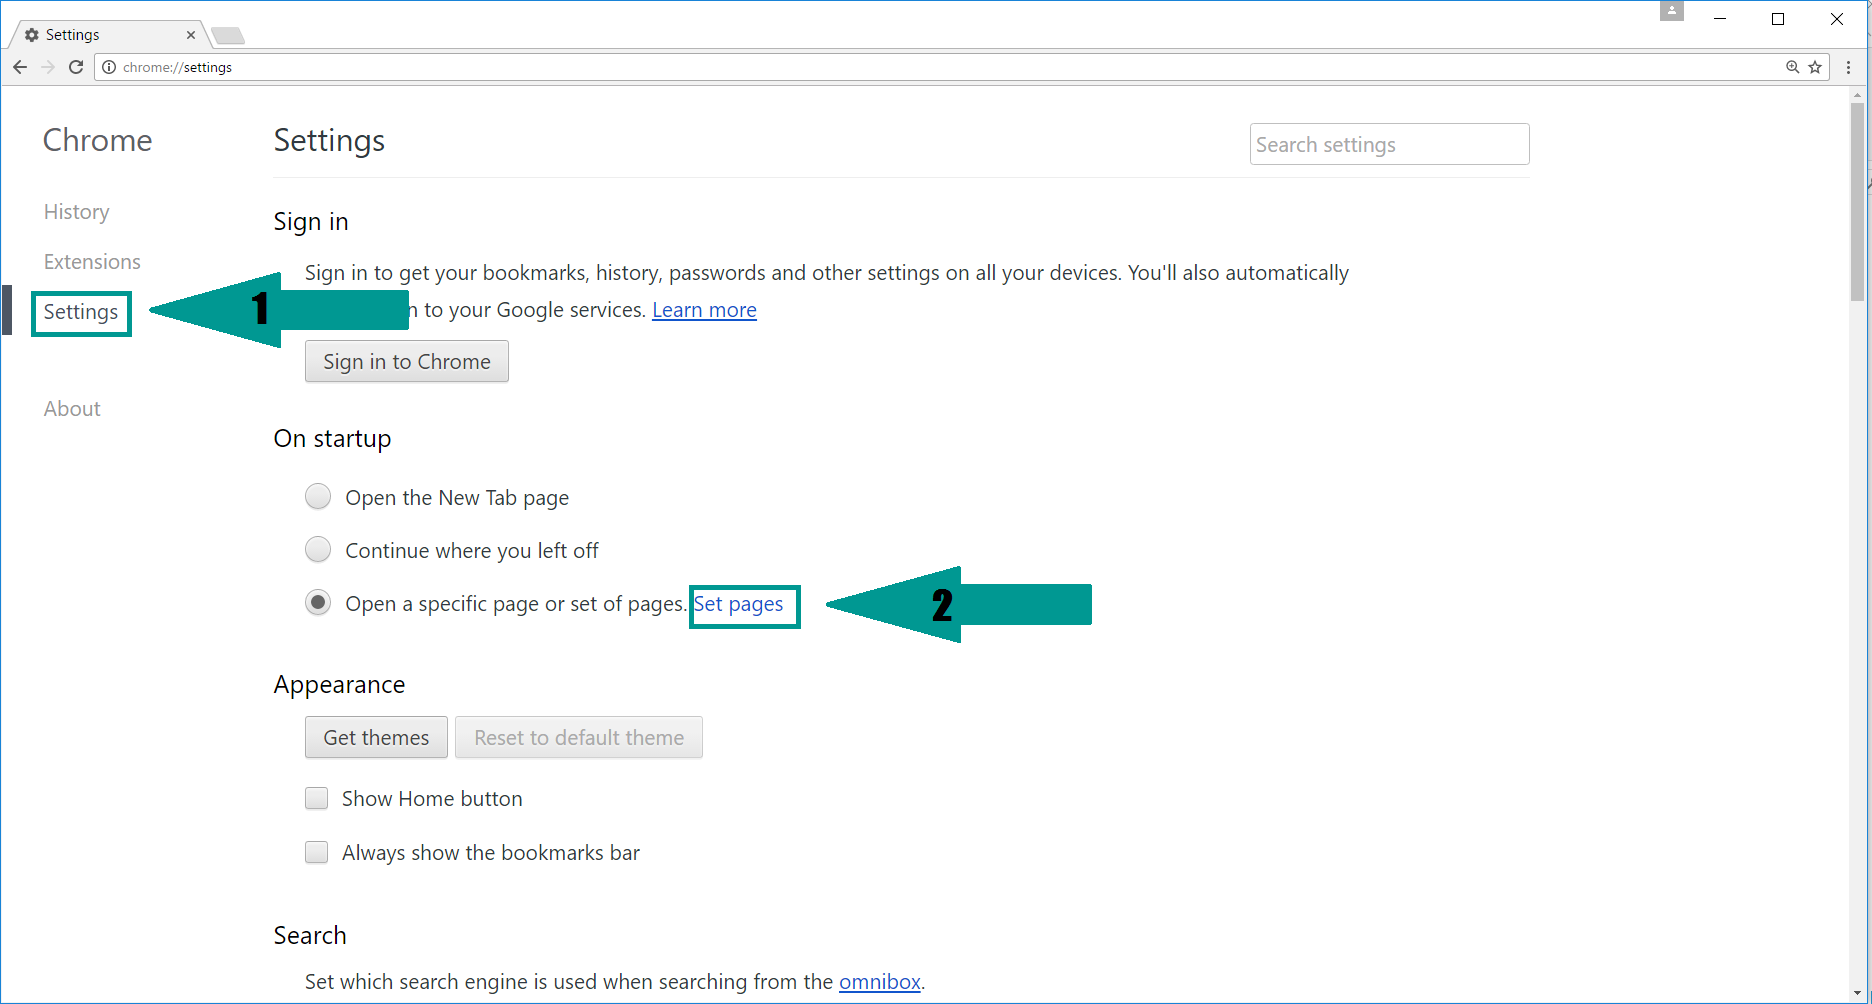
3. Again in the left menu, under Chrome, Click on “Settings“. Go under “On Startup” and set a new page.
4. Afterward, scroll down to “Search“, click on “Manage search engines“.
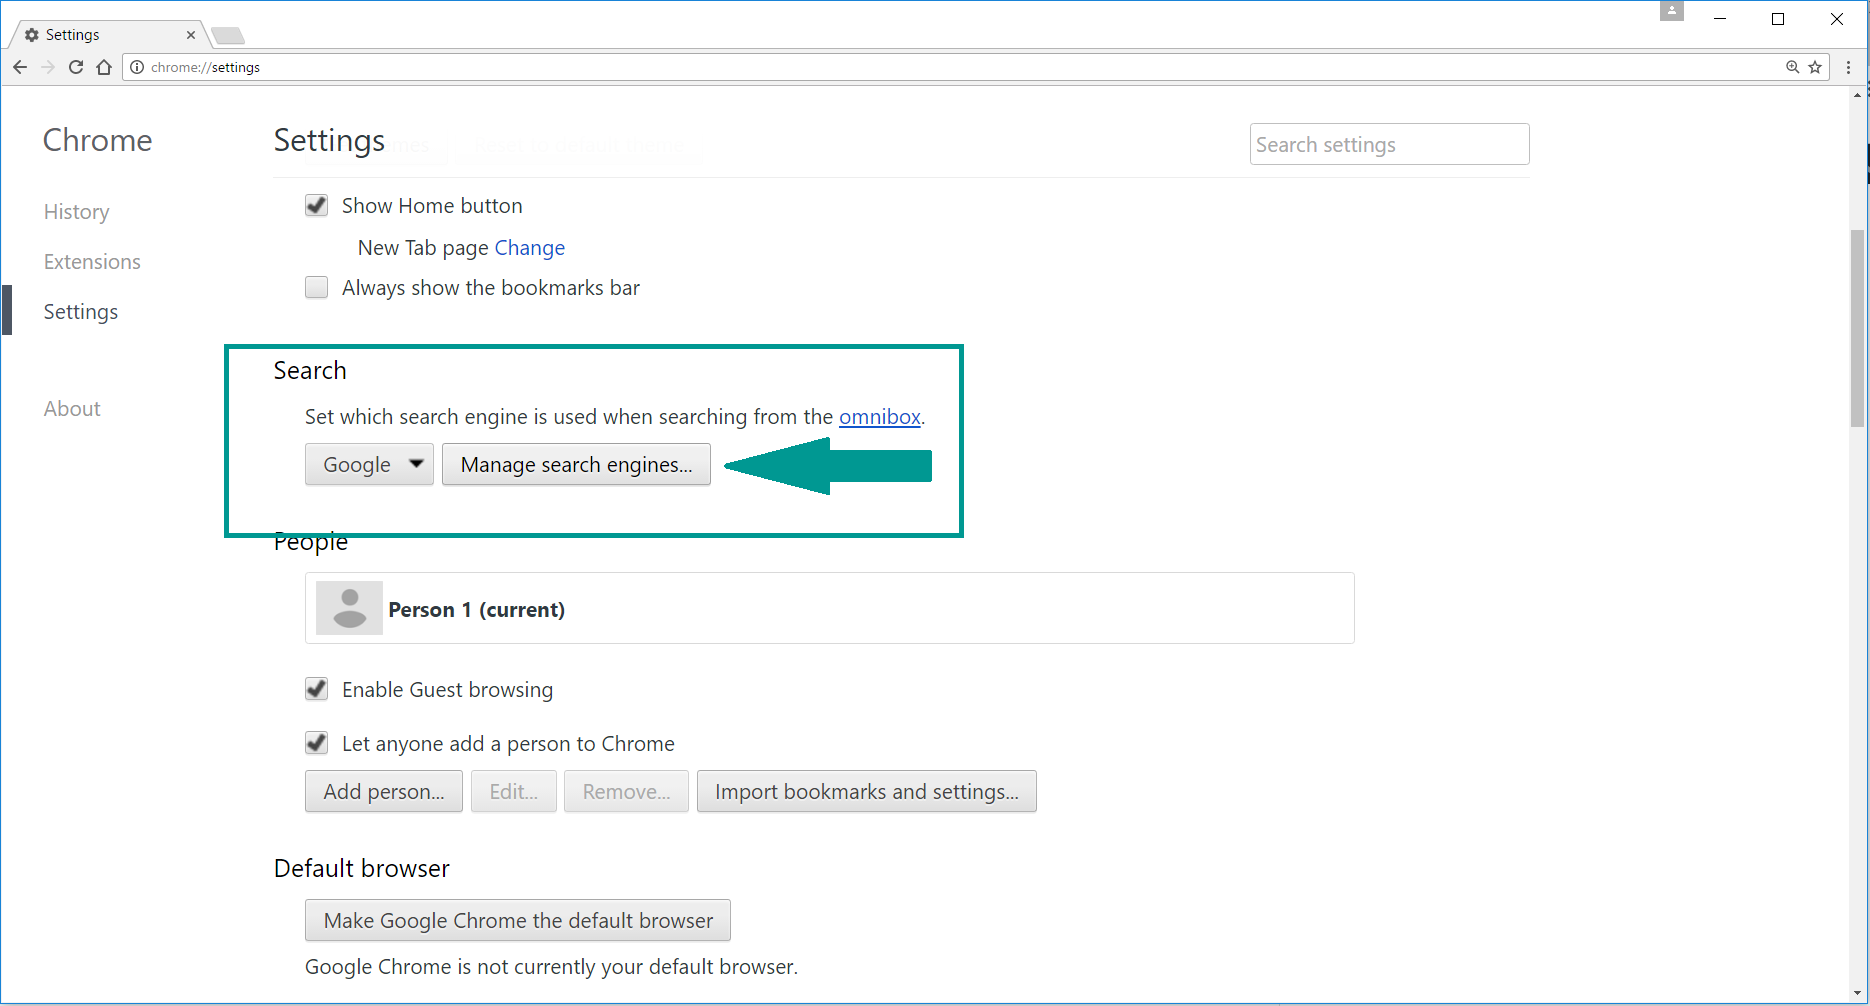
5. In the default search settings list, find the unknown search engine and click on “X“. Then select your search engine of choice and click “Make default“. When you are ready click “Done” button in the right bottom corner.
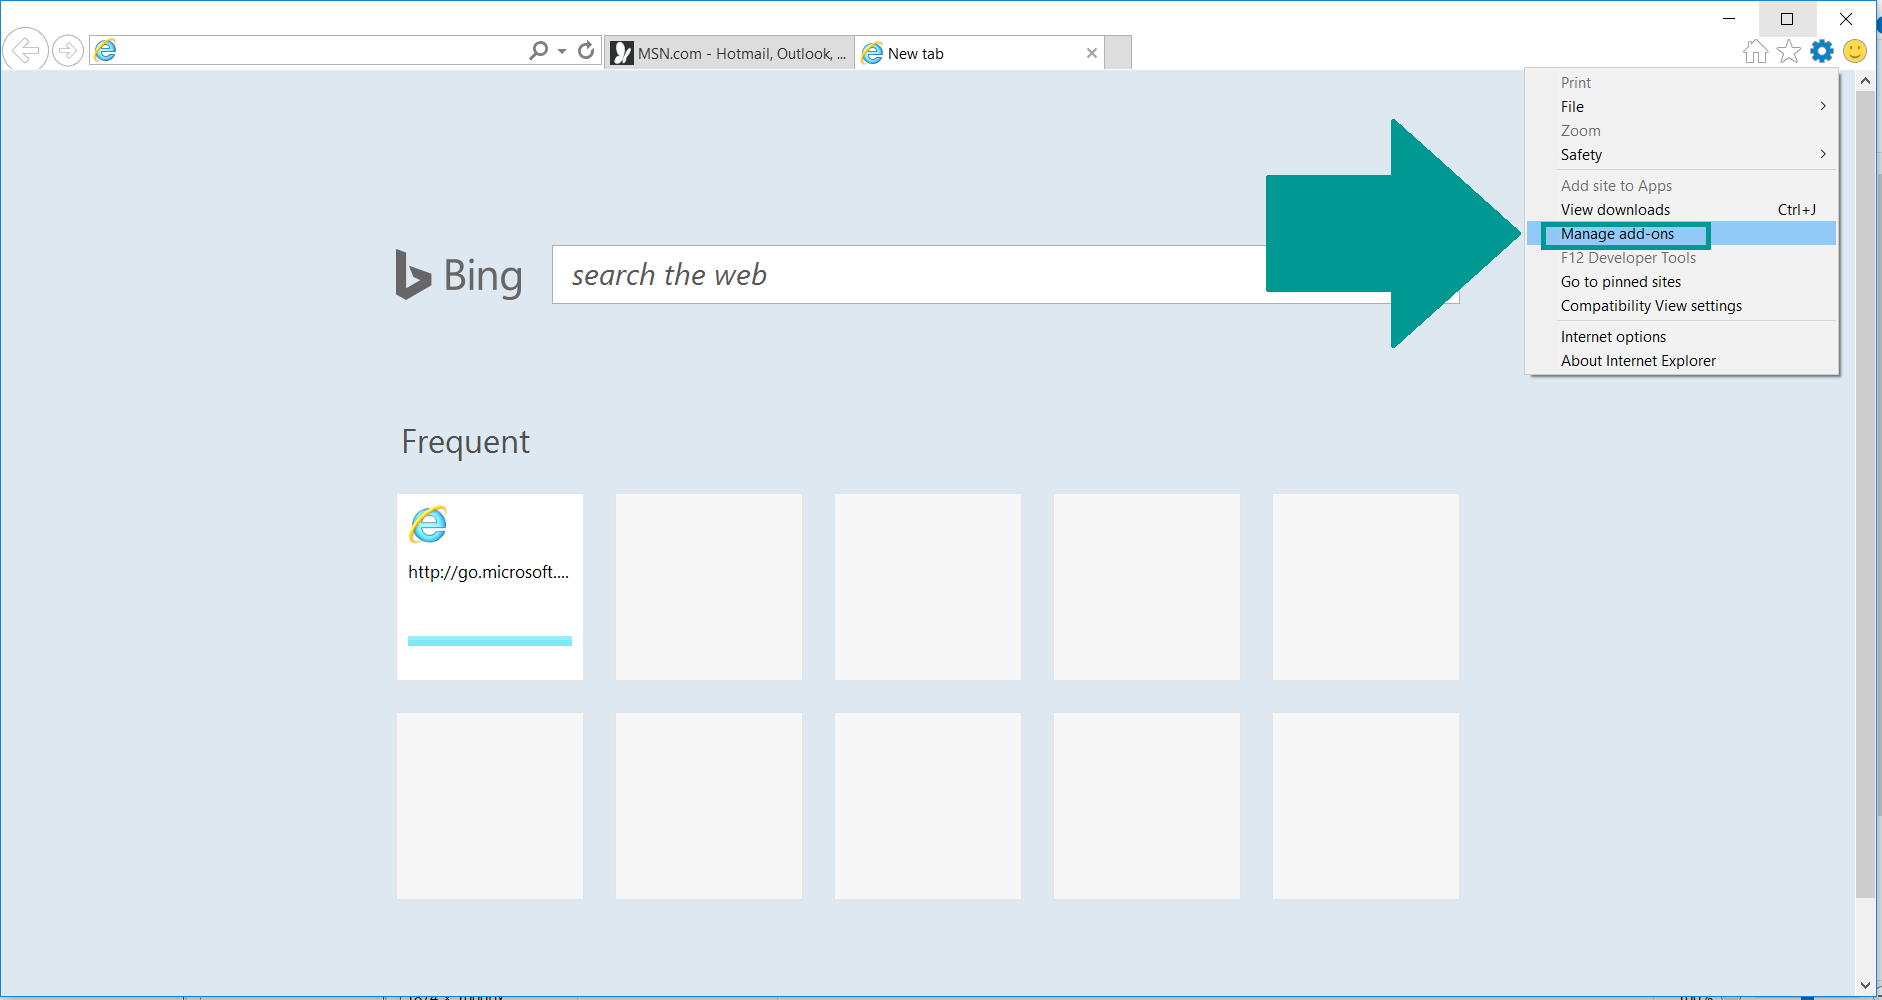
2. In the “Manage add-ons” window, bellow “Add-on Types“, select “Toolbars and Extensions“. If you see a suspicious toolbar, select it and click “Remove“.
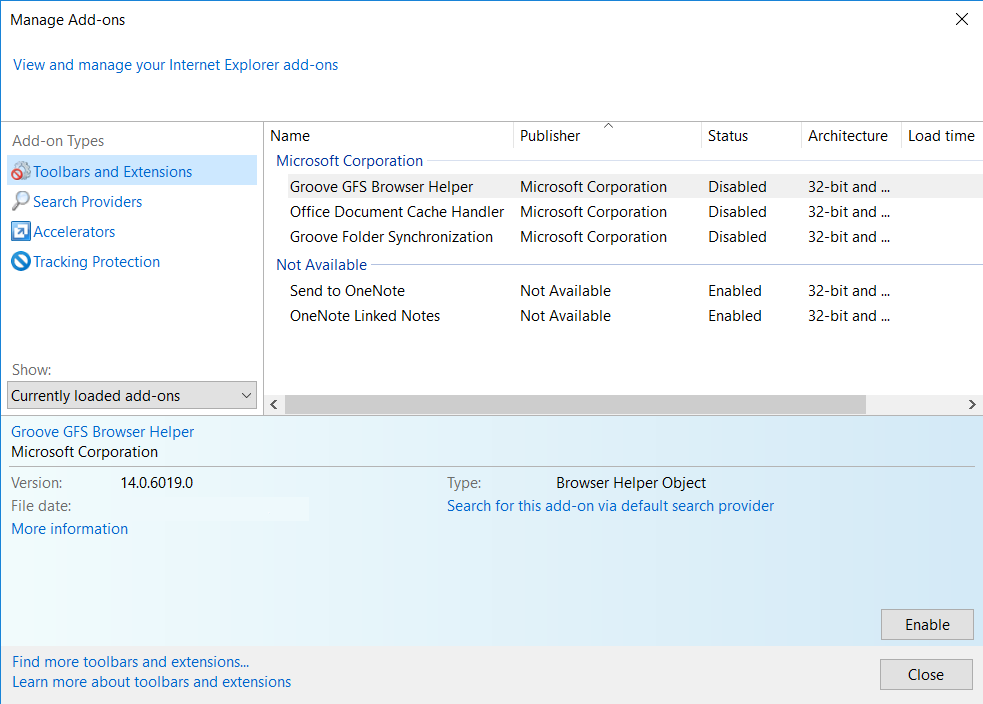
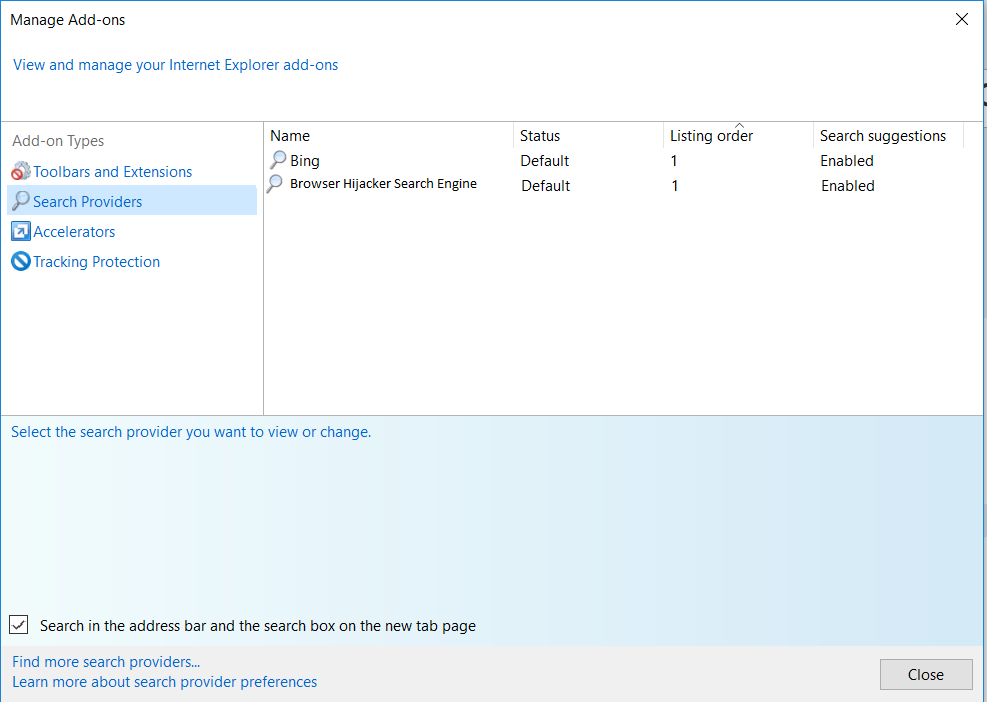
3. Then again in the “Manage Add-ons” window, in “Add-on Types“, Select “Search Providers“. Chose a search engine and click “Set as default“. Select the unknown search engine and click “Remove and Close”.
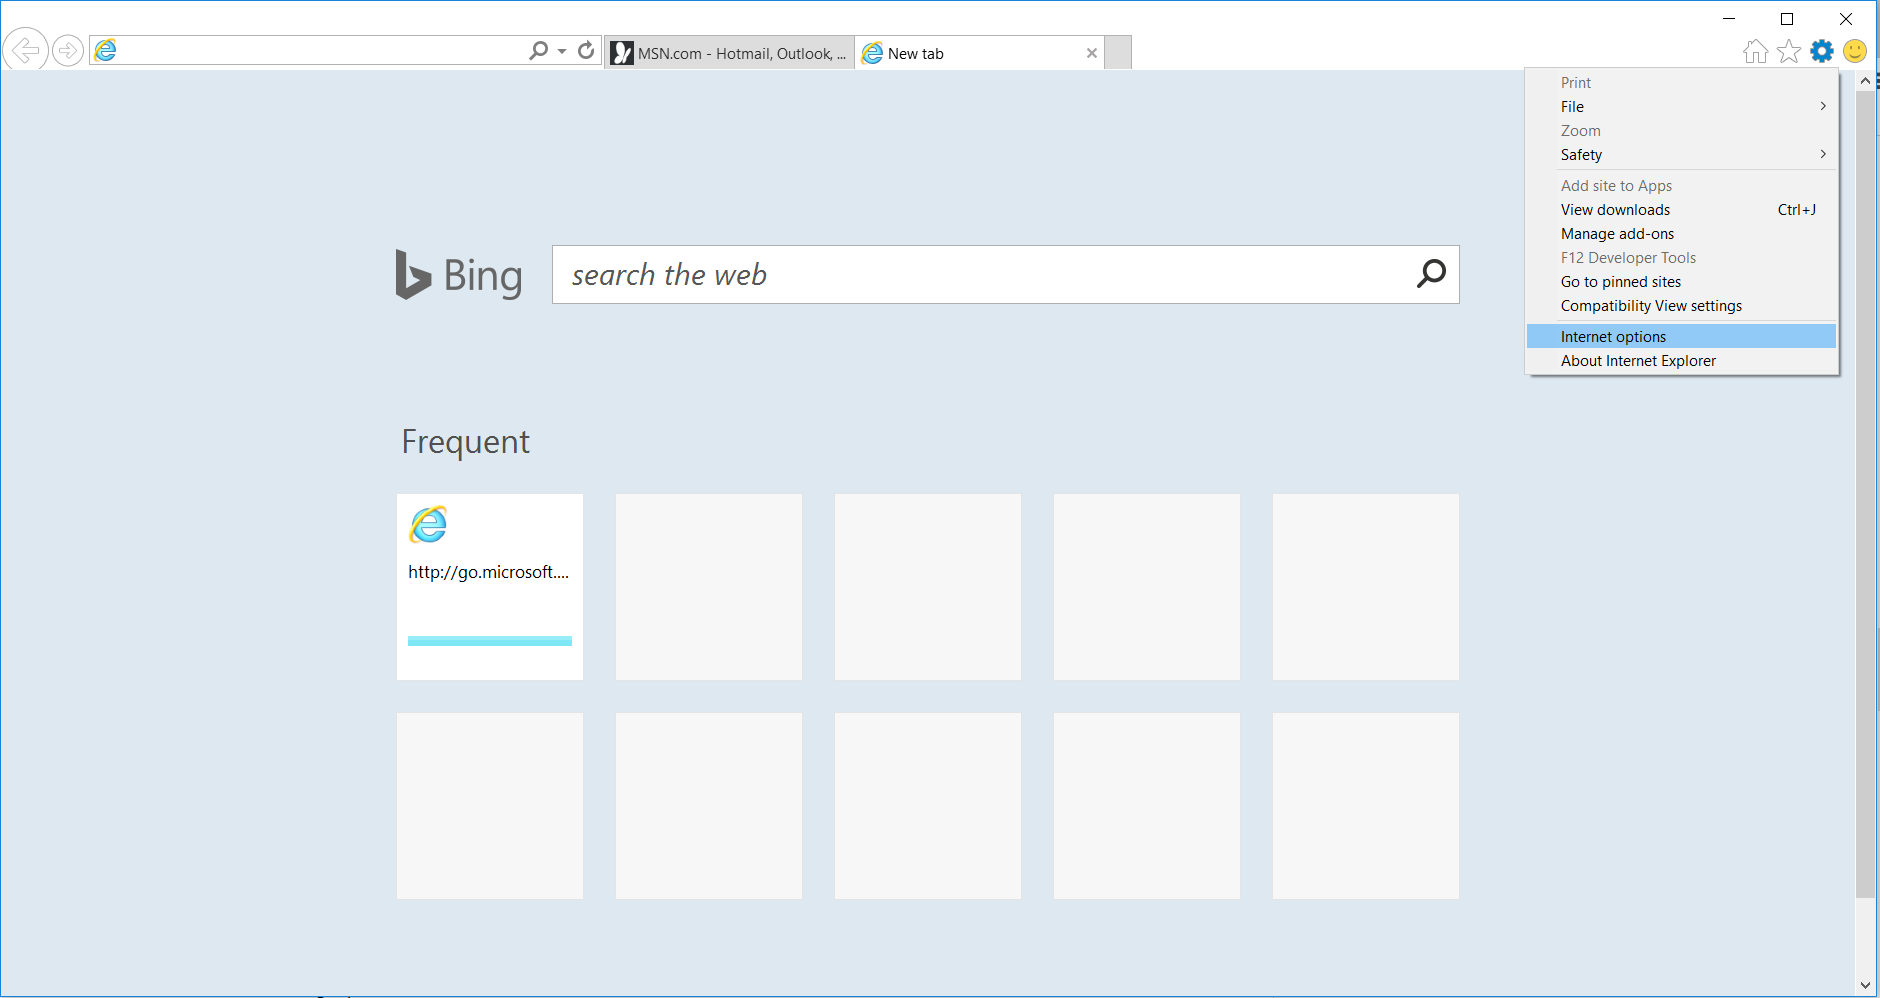
4. Open the Tools menu, select “Internet Options”.
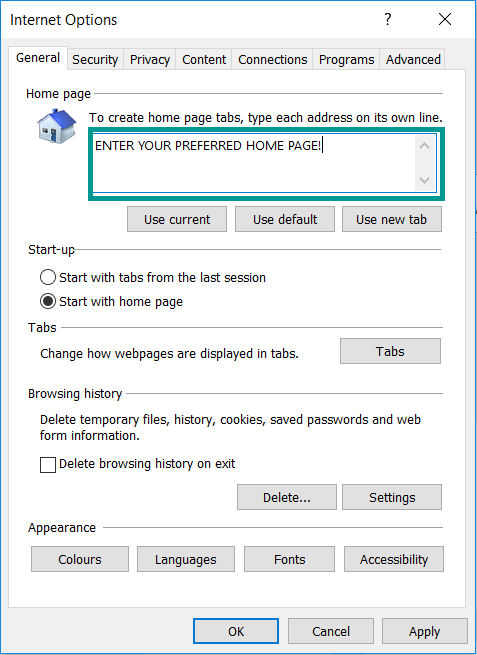
5. In the “General” tab, in “Home page”, enter your preferred page. Click “Apply” and “OK”.
Repair Windows Registry
1. Again type simultaneously the WIN Key + R key combination
2. In the box, write regedit and hit Enter
3. Type the CTRL+ F and then write the malicious name in the search type field to locate the malicious executable
4. In case you have discovered registry keys and values related to the name, you should delete them, but be careful not to delete legitimate keys
Click for more information about Windows Registry and further repair help