


An infection with the dangerous TrustedInstaller leads to serious security issues. Victims can restore and protect their computers by following our complete removal guide.
Remove TrustedInstaller and Restore PC
Manual Removal Guide
Skip all steps and download anti-malware tool that will safely scan and clean your PC.
SpyHunter anti-malware tool will diagnose all current threats on the computer. By purchasing the full version, you will be able to remove all malware threats instantly. Additional information about SpyHunter / Help to uninstall SpyHunter
Distribution of TrustedInstaller
The TrustedInstaller is a new virus which has been sighted in a limited attack campaign. At the moment the security researchers cannot determine the primary infection strategy. We presume that the most widely used tactics are going to be employed.
Among them are the email messages created in an automated way and sent to large lists of potential victims. The TrustedInstaller can be directly attached to the messages. This is one of the easiest way for the criminals to attempt the infection. However a lot of email hosting providers usually capture the signatures of the virus and as such discard such messages or label them as dangerous or spam. Other infection methods related to this one is the option of inserting hyperlinks in the body content of the messages. The links are usually labelled as leading to a familiar website or a file of user interest. Redirects can redirect to hacker-controlled sites, infected payloads or other instances that can lead to an TrustedInstaller infection.
The computer criminals behind the malware can create malicious sites or download portals which distribute malware of different kinds, including the TrustedInstaller. A popular option is the use of infected documents which may be of different types ‒ spreadsheets, rich text documents, presentations and databases. They are modified to initiate the virus once the built-in scripts are run. Usually when the files are opened a notification will ask the users to run the macros (scripts). If this is done the infection follows.
The hacker-controlled sites are specialist portals that have been created either manually or automatically by the criminals behind the TrustedInstaller. They can either directly distribute the threat by initiating various scripts or automated operations or link to such instances. Redirects are usually caused by email interaction, ad networks or other browsing activity. However one of the main sources is the availability of browser hijackers. They are malicious addons made for the most popular web browsers ‒ Mozilla Firefox, Google Chrome, Internet Explorer, Opera, Microsoft Edge and Safari. Once installed they not only infect the users with the malware, but also redirect the victims to a hacker-controlled site. Depending on the configuration the browser hijackers can also steal sensitive information such as any stored passwords, account credentials, history, bookmarks, form data and settings.
Impact of TrustedInstaller
Security reports indicate that a large number of users have reported infections with the TrustedInstaller virus. Depending on the individual case there may be different explanations regarding the attained strains:
- Legitimate Process — Some anti-virus and security software can label this is a malware if sudden performance spikes are detected.
- Malware Infection — Actual virus infections can use the TrustedInstaller name to mask themselves.
- Process Hookup — Malware threats can hookup to the TrustedInstaller processs and use it to cause dangerous system modifications.
Microsoft Windows does include a legitimate process called “TrustedInstaller.exe” which is part of the Windows Modules Installer in the last few versions of the operating system family (10/8/7/Vista). It is used to install, remove or modify components during the update process, as well as optional system modules. It is located in the Windows system folder and by default it is initiated by the operaeting system under the local system account with no dependant processes. Any different behavior should provoke suspicion.
Most of the reports actually refer to an issue caused by the TrustedInstaller instance. It is able to take over ownership of files and folders which can hinder normal computer user interaction. Note that such behavior can also be associated with malware instances, this is the reason why we recommend that everyone use a quality anti-spyware solution to make sure that their systems are clean of infections. In some cases registry changes can be made to the system. Malware samples that use the TrustedInstaller name can lead to performance issues, application failure and other symptoms. Further malware actions can lead to the following consequences:
- Trojan Modules — Malware instances can cause trojan infections that can lead to a situation where the hacker controlllers can spy on their targets in real time. Advanced versions can utilize the TrustedInstaller virus to record the keystrokes and mouse movement as well. Using such methods the operators can also execute arbitrary commands at will and take over control of the victim machines at any given time.
- System Modifications — Malware instances of the TrustedInstaller instance can be used to institute changes to the operating system such as boot and recovery options, the registry and configuration files.
- Data Modification — Malware samples can remove the shadow volume copies of all found data. This prevents data recovery without the use of a professional grade data recovery software.
Remove TrustedInstaller and Restore PC
WARNING! Manual removal of the TrustedInstaller requires being familiar with system files and registries. Removing important data accidentally can lead to permanent system damage. If you don’t feel comfortable with manual instructions, download a powerful anti-malware tool that will scan your system for malware and clean it safely for you.
SpyHunter anti-malware tool will diagnose all current threats on the computer. By purchasing the full version, you will be able to remove all malware threats instantly. Additional information about SpyHunter / Help to uninstall SpyHunter
TrustedInstaller – Manual Removal Steps
Start the PC in Safe Mode with Network
This will isolate all files and objects created by the ransomware so they will be removed efficiently. The steps bellow are applicable to all Windows versions.
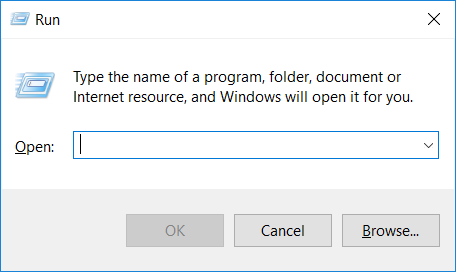
1. Hit the WIN Key + R
2. A Run window will appear. In it, write msconfig and then press Enter
3. A Configuration box shall appear. In it Choose the tab named Boot
4. Mark Safe Boot option and then go to Network under it to tick it too
5. Apply -> OK
Remove TrustedInstaller from Windows
Here’s a way to remove the program. This method will work regardless if you’re on Windows 10, 8, 7, Vista or XP. Simply selecting the program and pressing delete won’t work, as it’ll leave a lot of small files. That’s bad because these leftovers can linger on and cause all sorts of problems. The best way to delete a program is to uninstall it. Here’s how you can do that:
1. Hold the “Windows” button (It’s between CTRL and Alt on most keyboards) and press “R”. You’ll see a pop-up window.
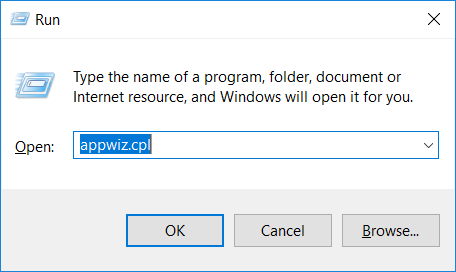
2. In the textbox, type “appwiz.cpl”, then press“ Enter ”.
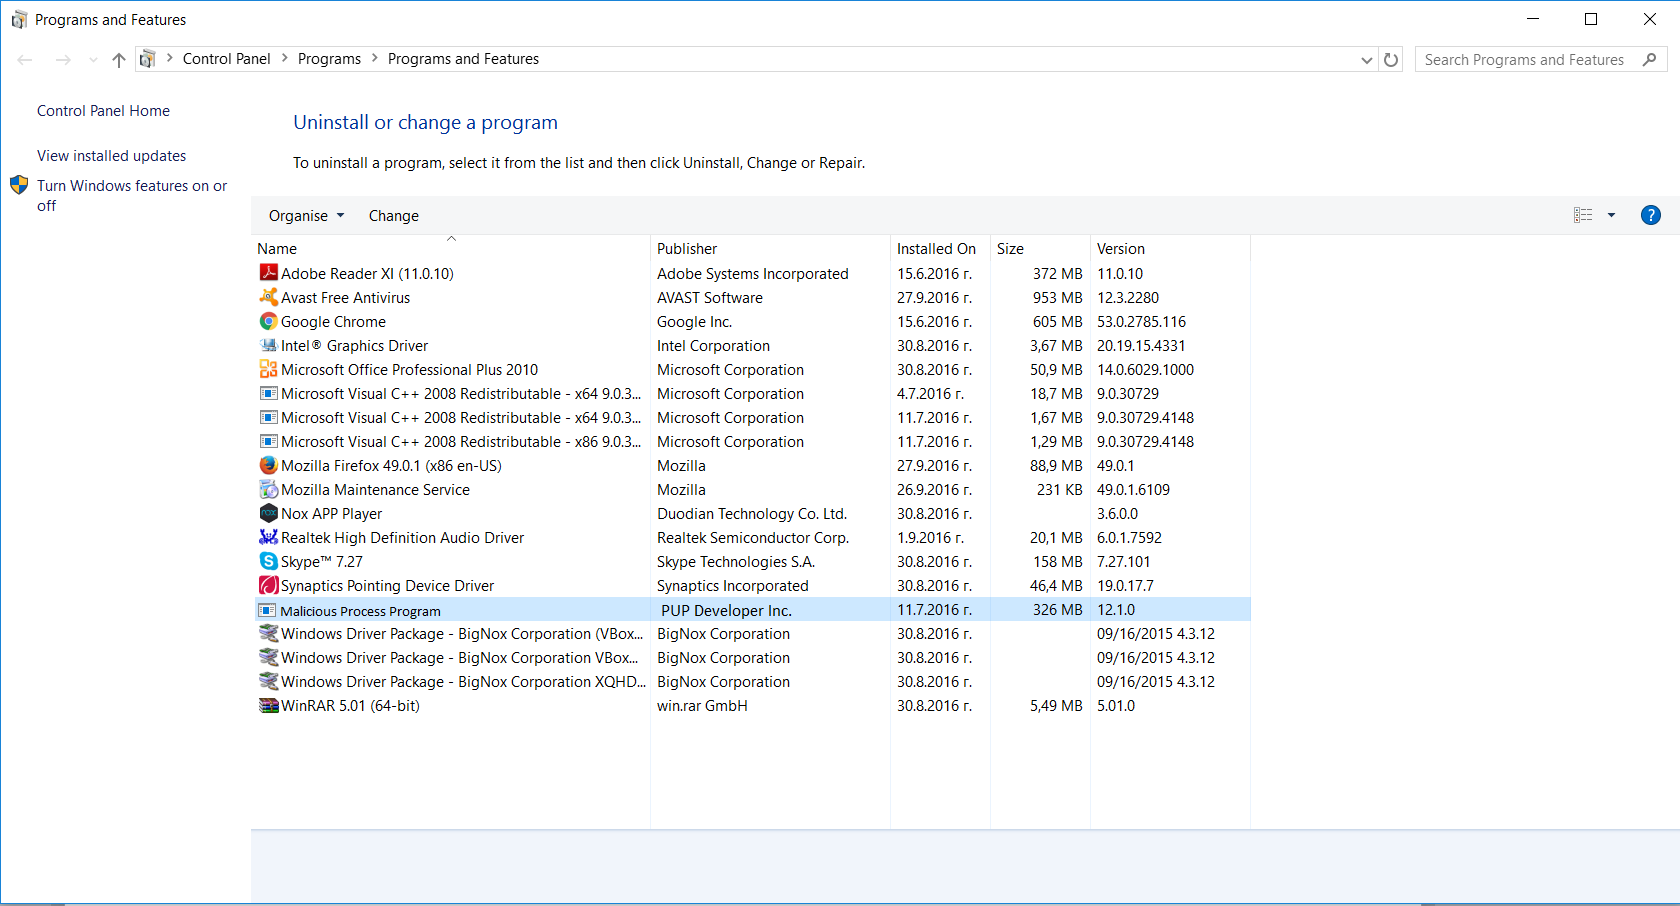
3. The “Programs and features” menu should now appear. It’s a list of all the programs installed on the PC. Here you can find the program, select it, and press “Uninstall“.
Remove TrustedInstaller Virus From Your Browser
Before resetting your browser’s settings, you should know that this action will wipe out all your recorded usernames, passwords, and other types of data. Make sure to save them in some way.
-
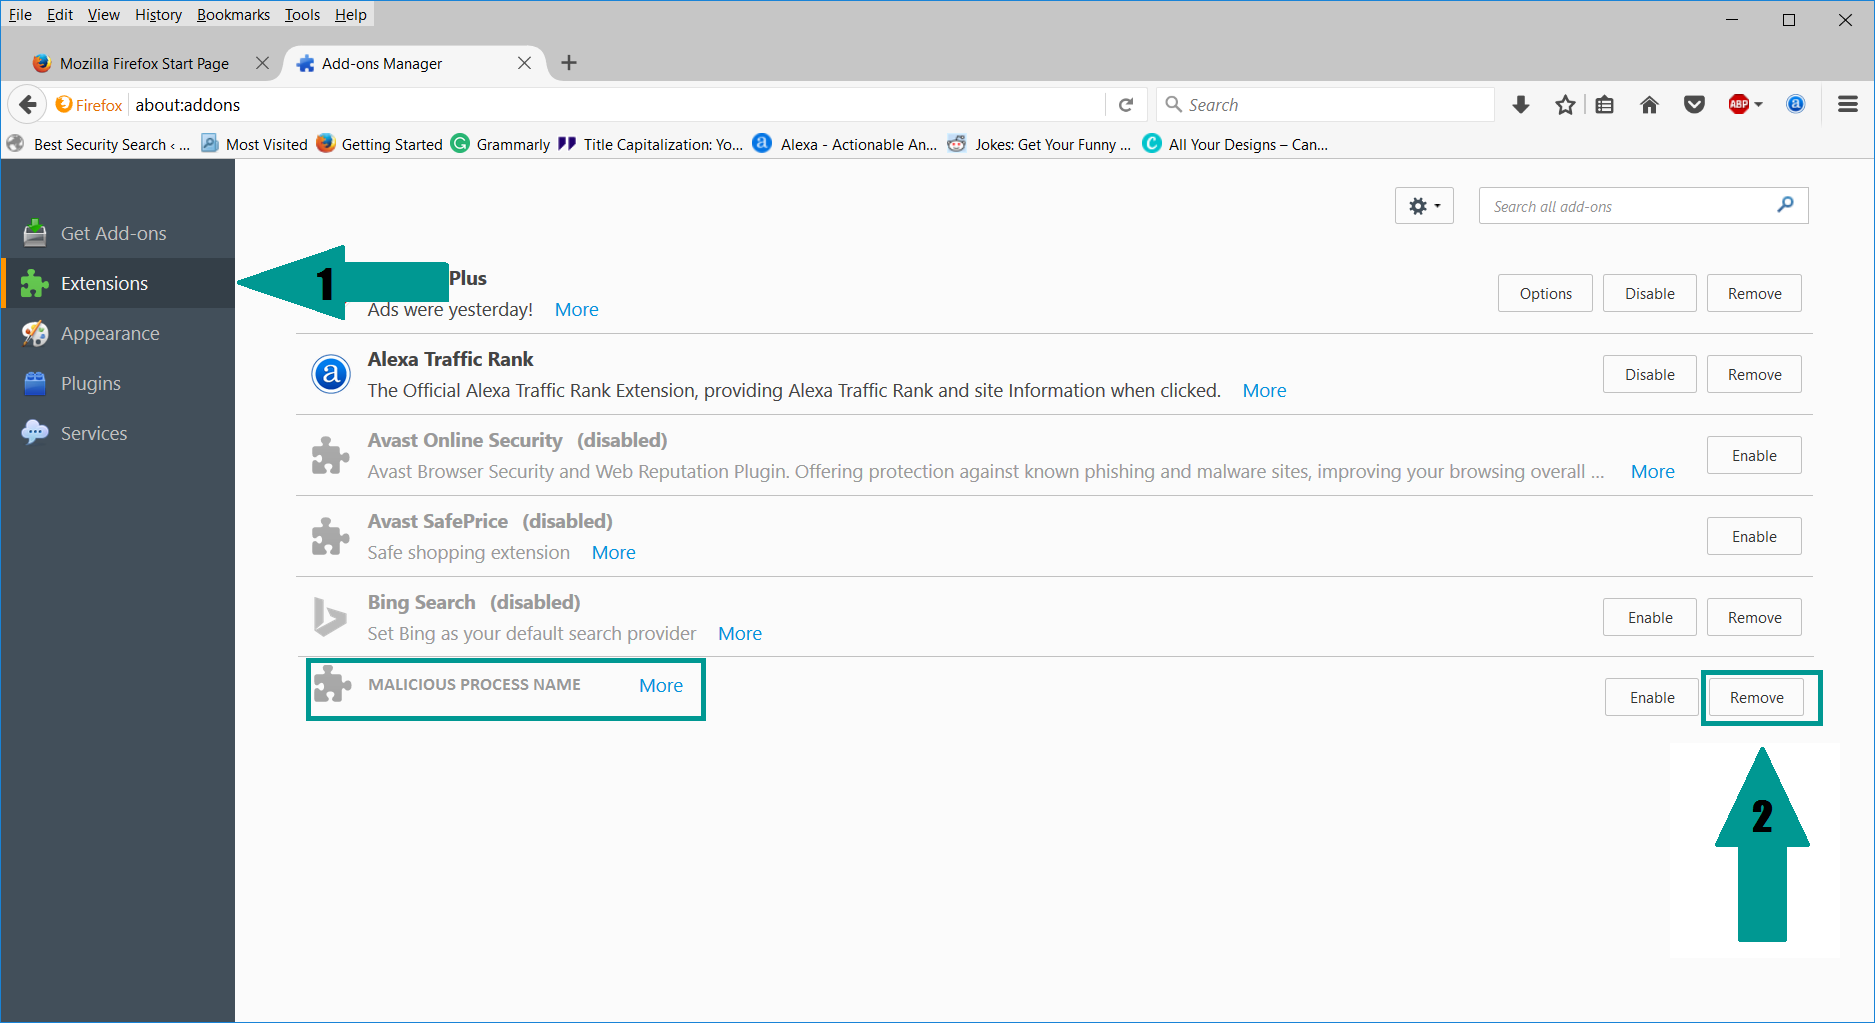
1. Start Mozilla Firefox. In the upper right corner, click on the Open menu icon and select “Add-ons“.
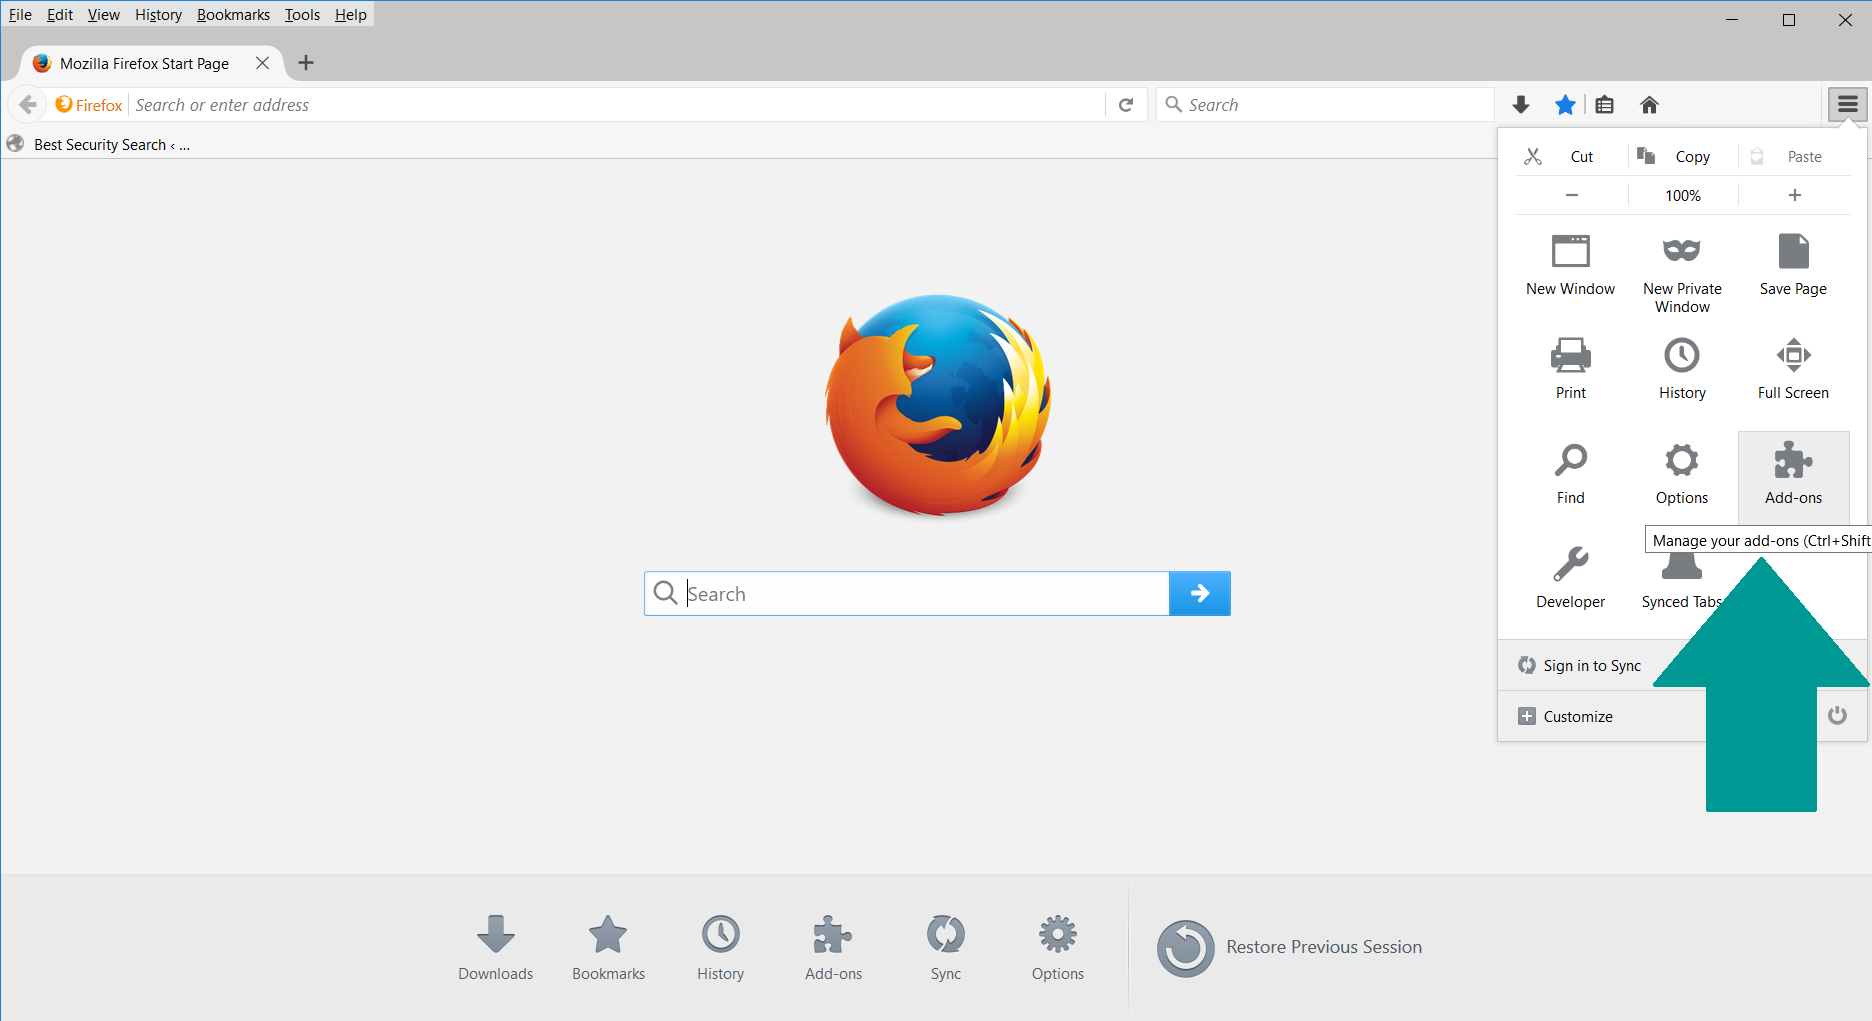
2. Inside the Add-ons Manager select “Extensions“. Search the list of extensions for suspicious entries. If you find any, select them and click “Remove“.
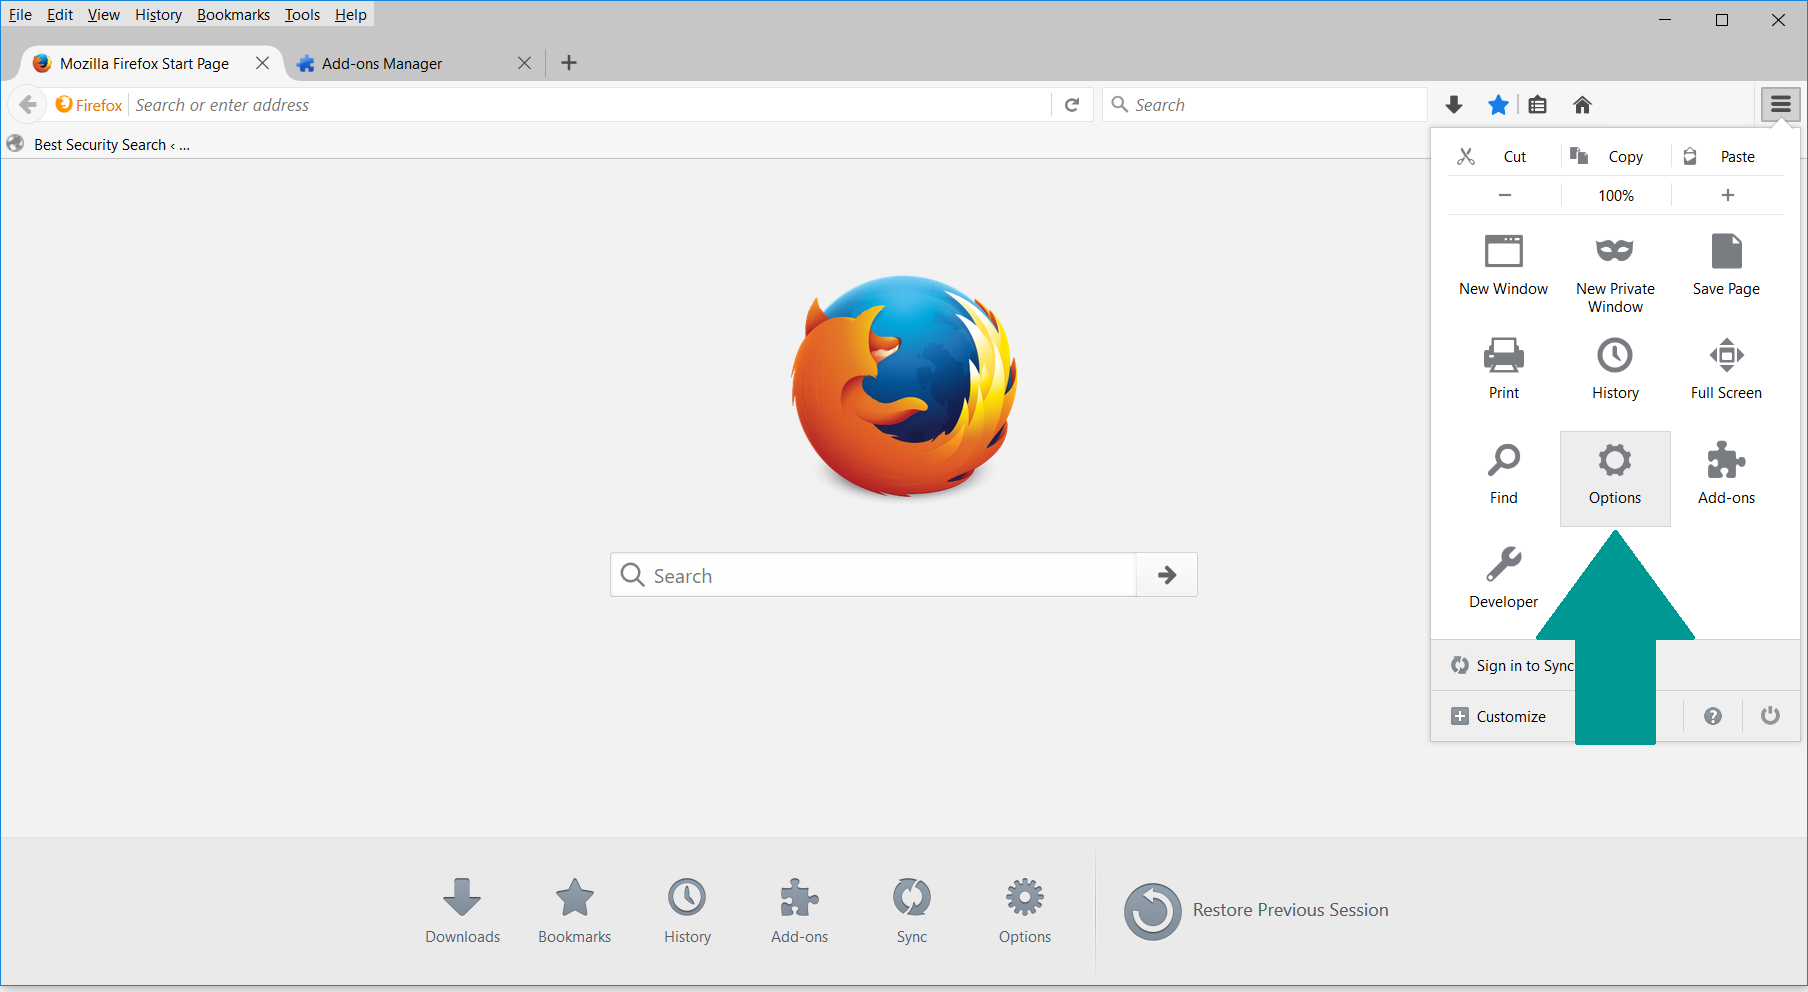
3. Click again on the Open menu icon, then click “Options“.
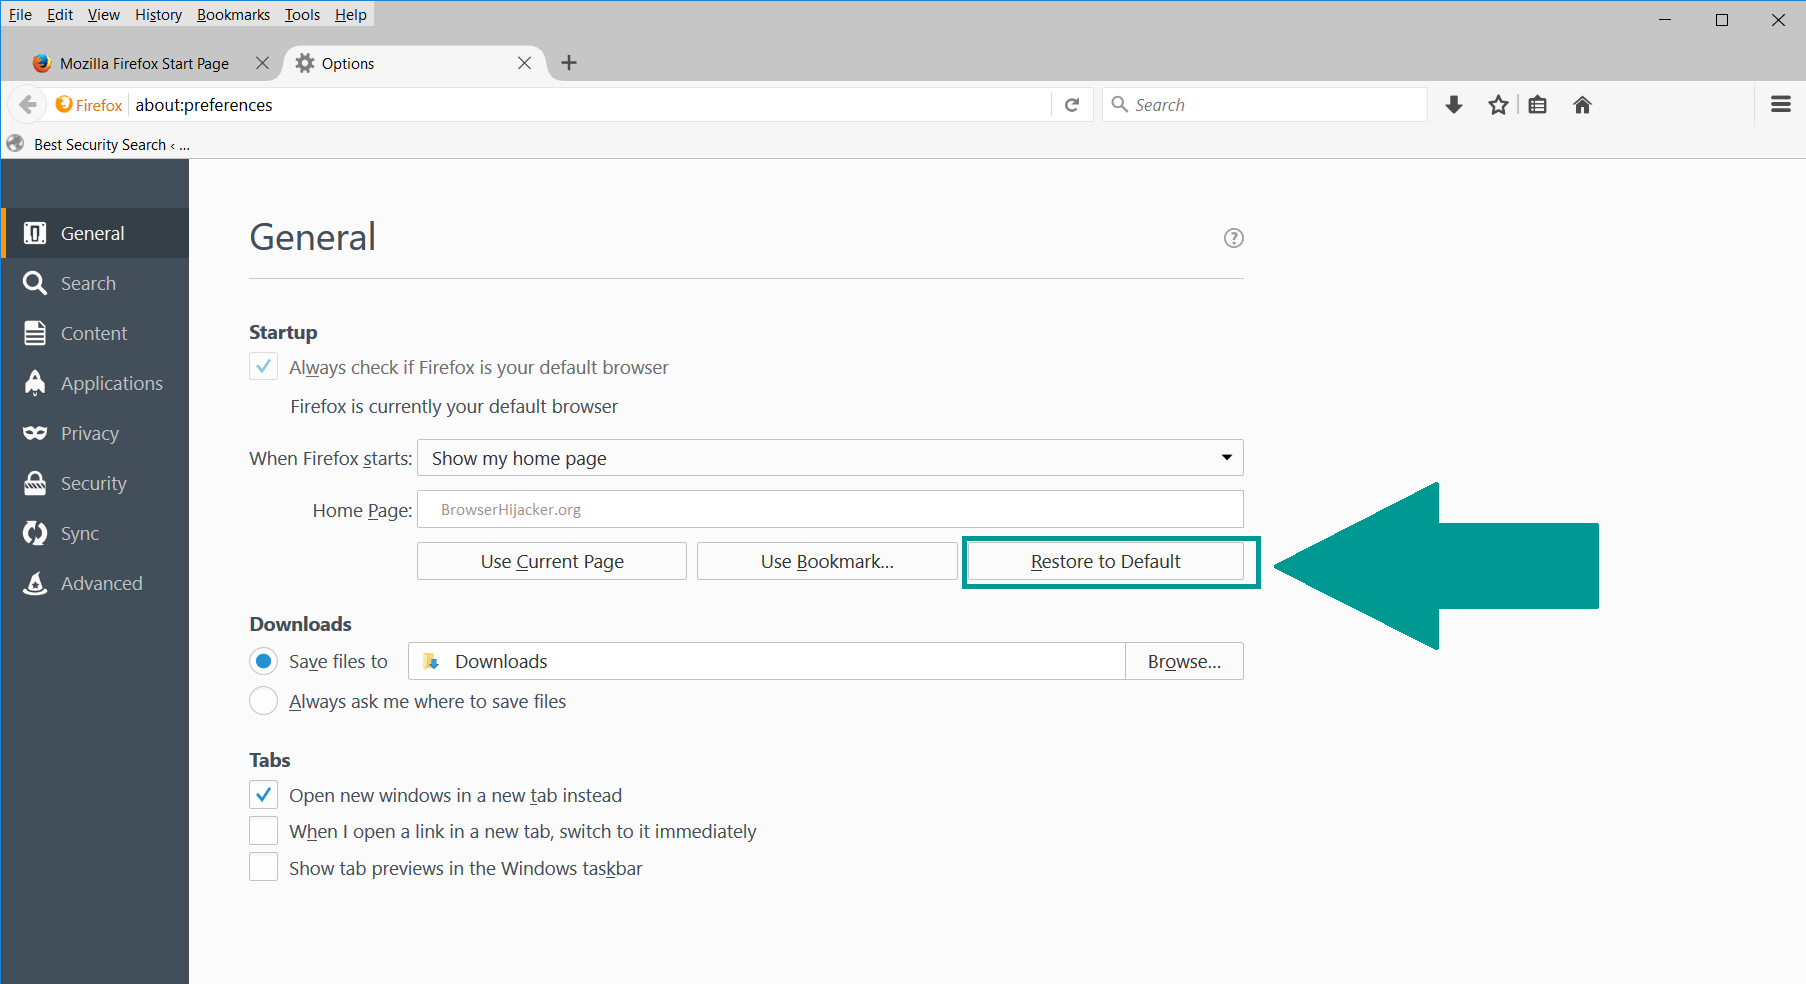
4. In the Options window, under “General” tab, click “Restore to Default“.
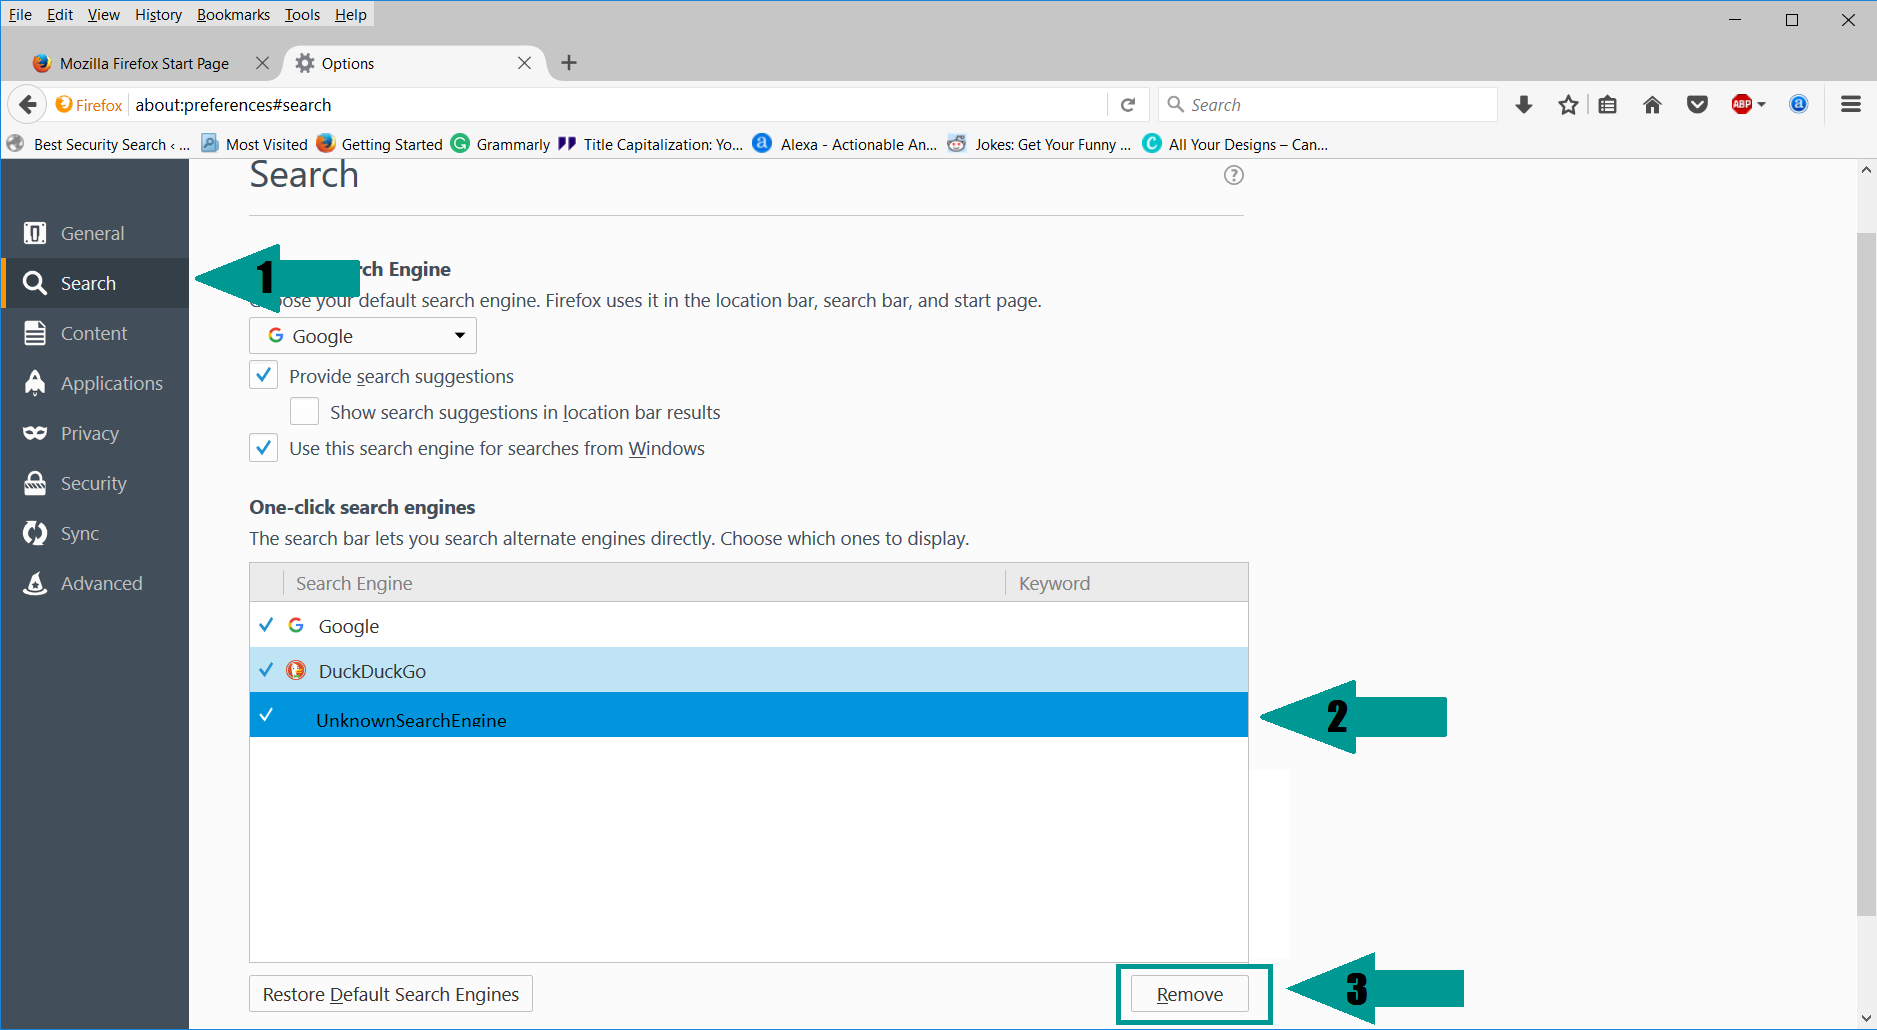
5. Select “Search” in the left menu, mark the unknown search engine and press “Remove”.
-
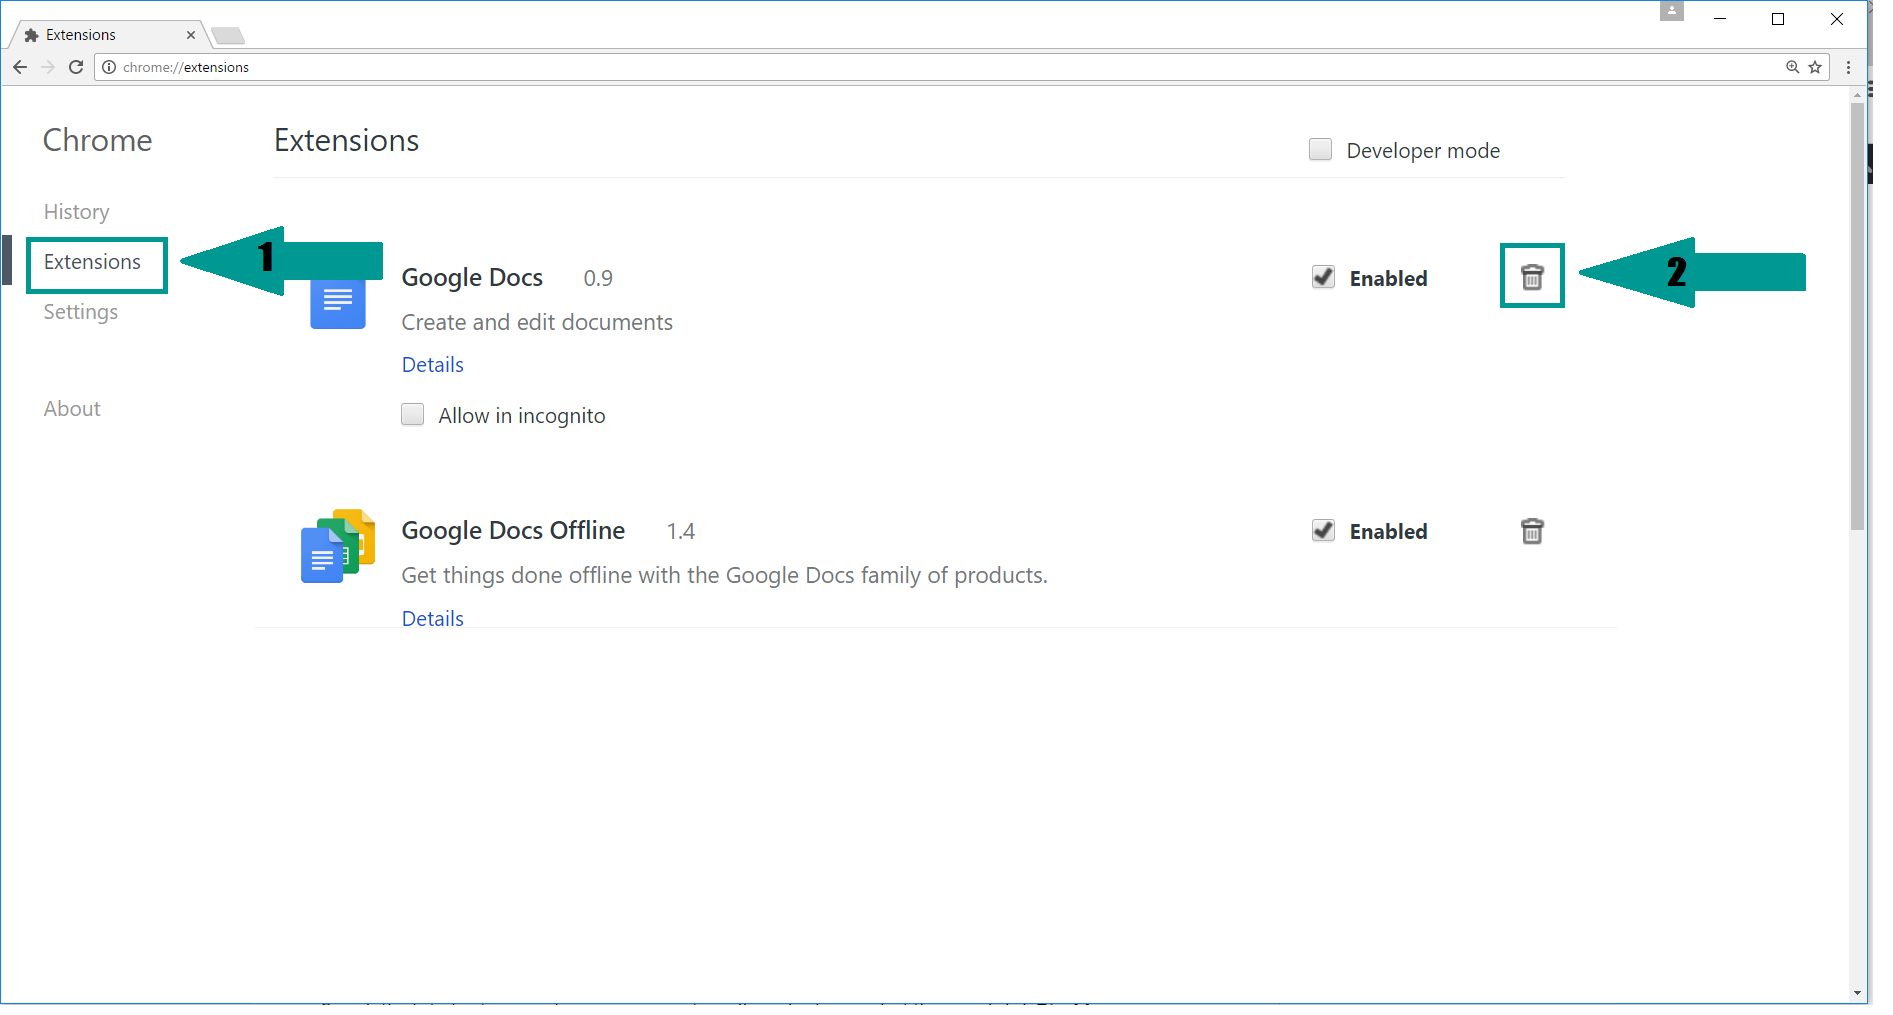
1. Start Google Chrome. On the upper-right corner, there a “Customize and Control” menu icon. Click on it, then click on “Settings“.

2. Click “Extensions” in the left menu. Then click on the trash bin icon to remove the suspicious extension.
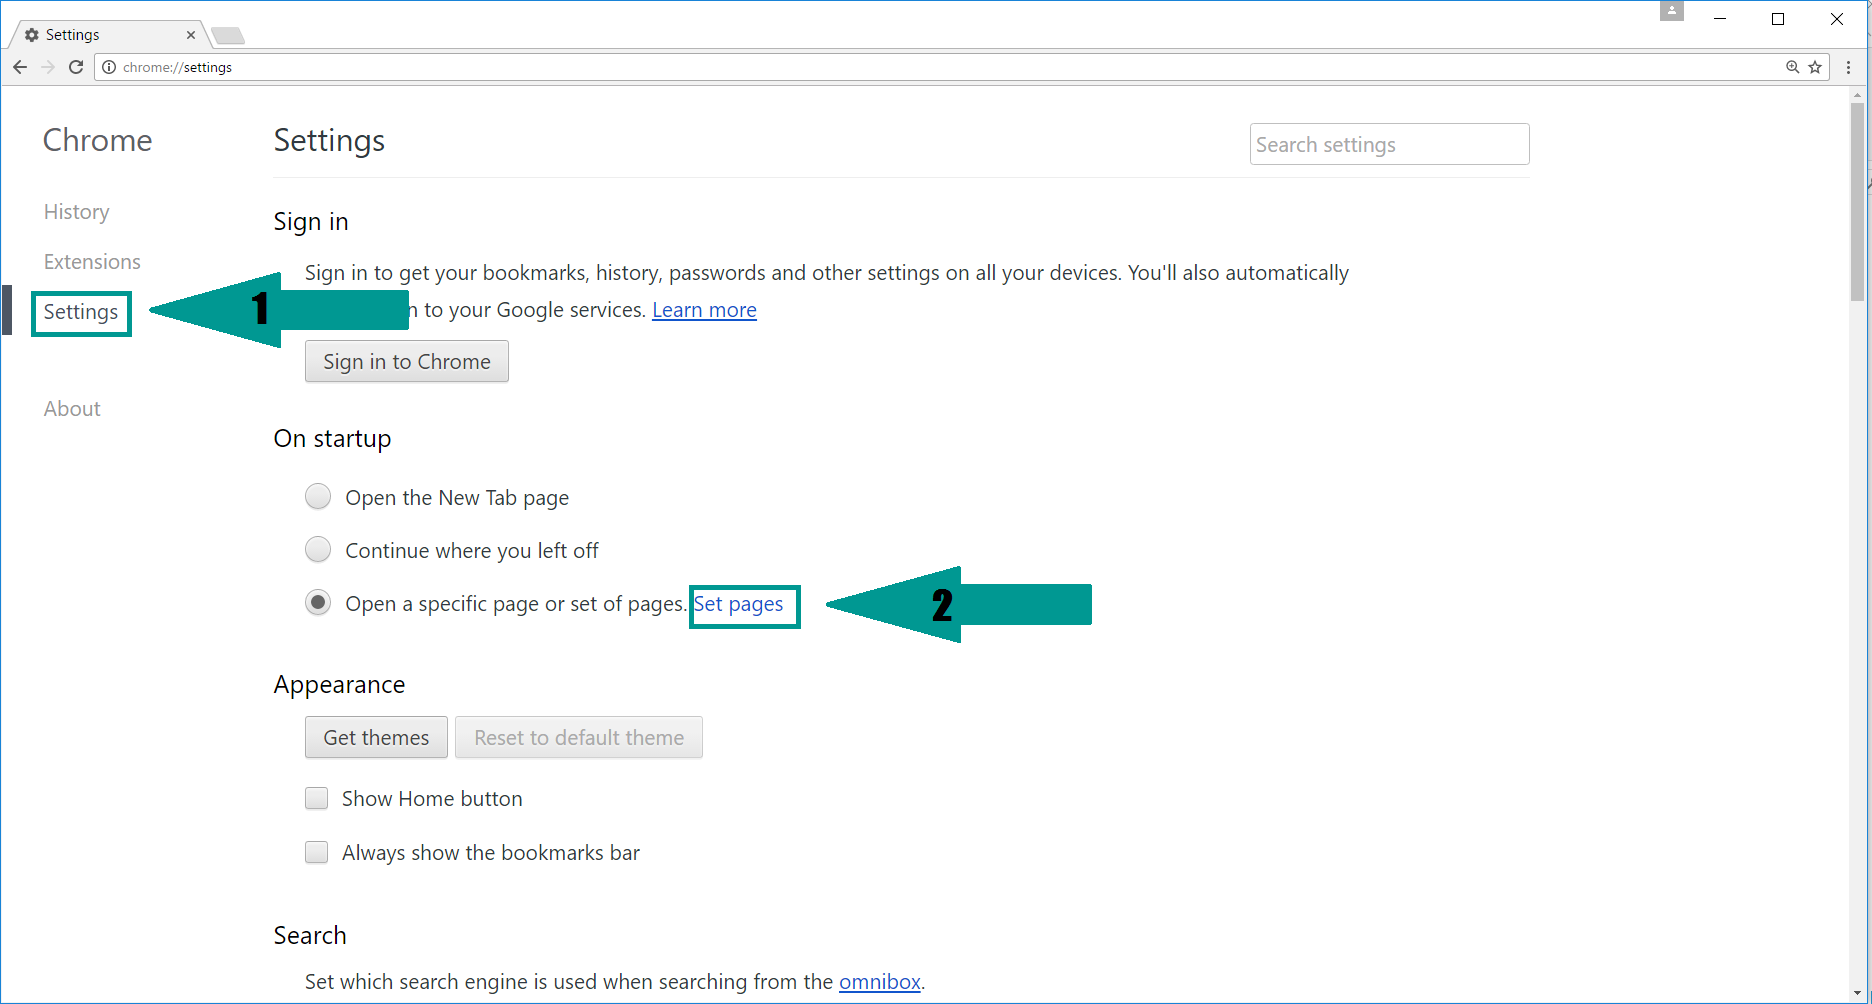
3. Again in the left menu, under Chrome, Click on “Settings“. Go under “On Startup” and set a new page.
4. Afterward, scroll down to “Search“, click on “Manage search engines“.
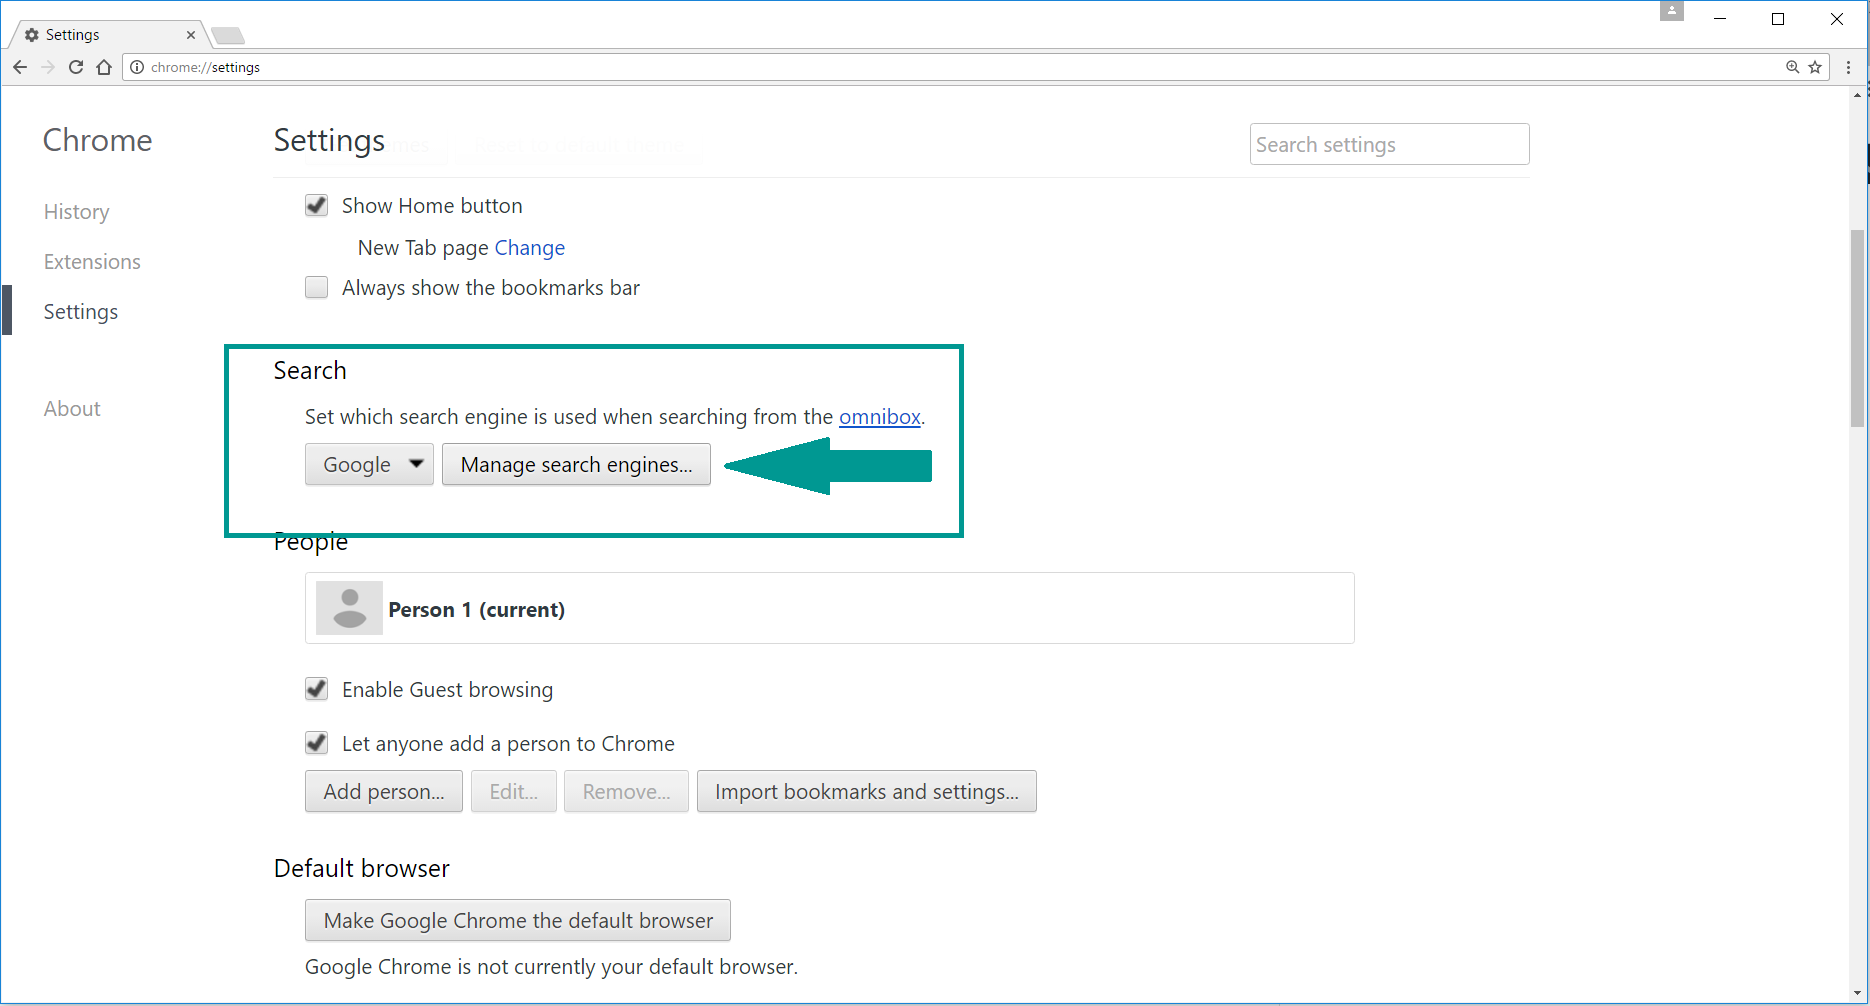
5. In the default search settings list, find the unknown search engine and click on “X“. Then select your search engine of choice and click “Make default“. When you are ready click “Done” button in the right bottom corner.
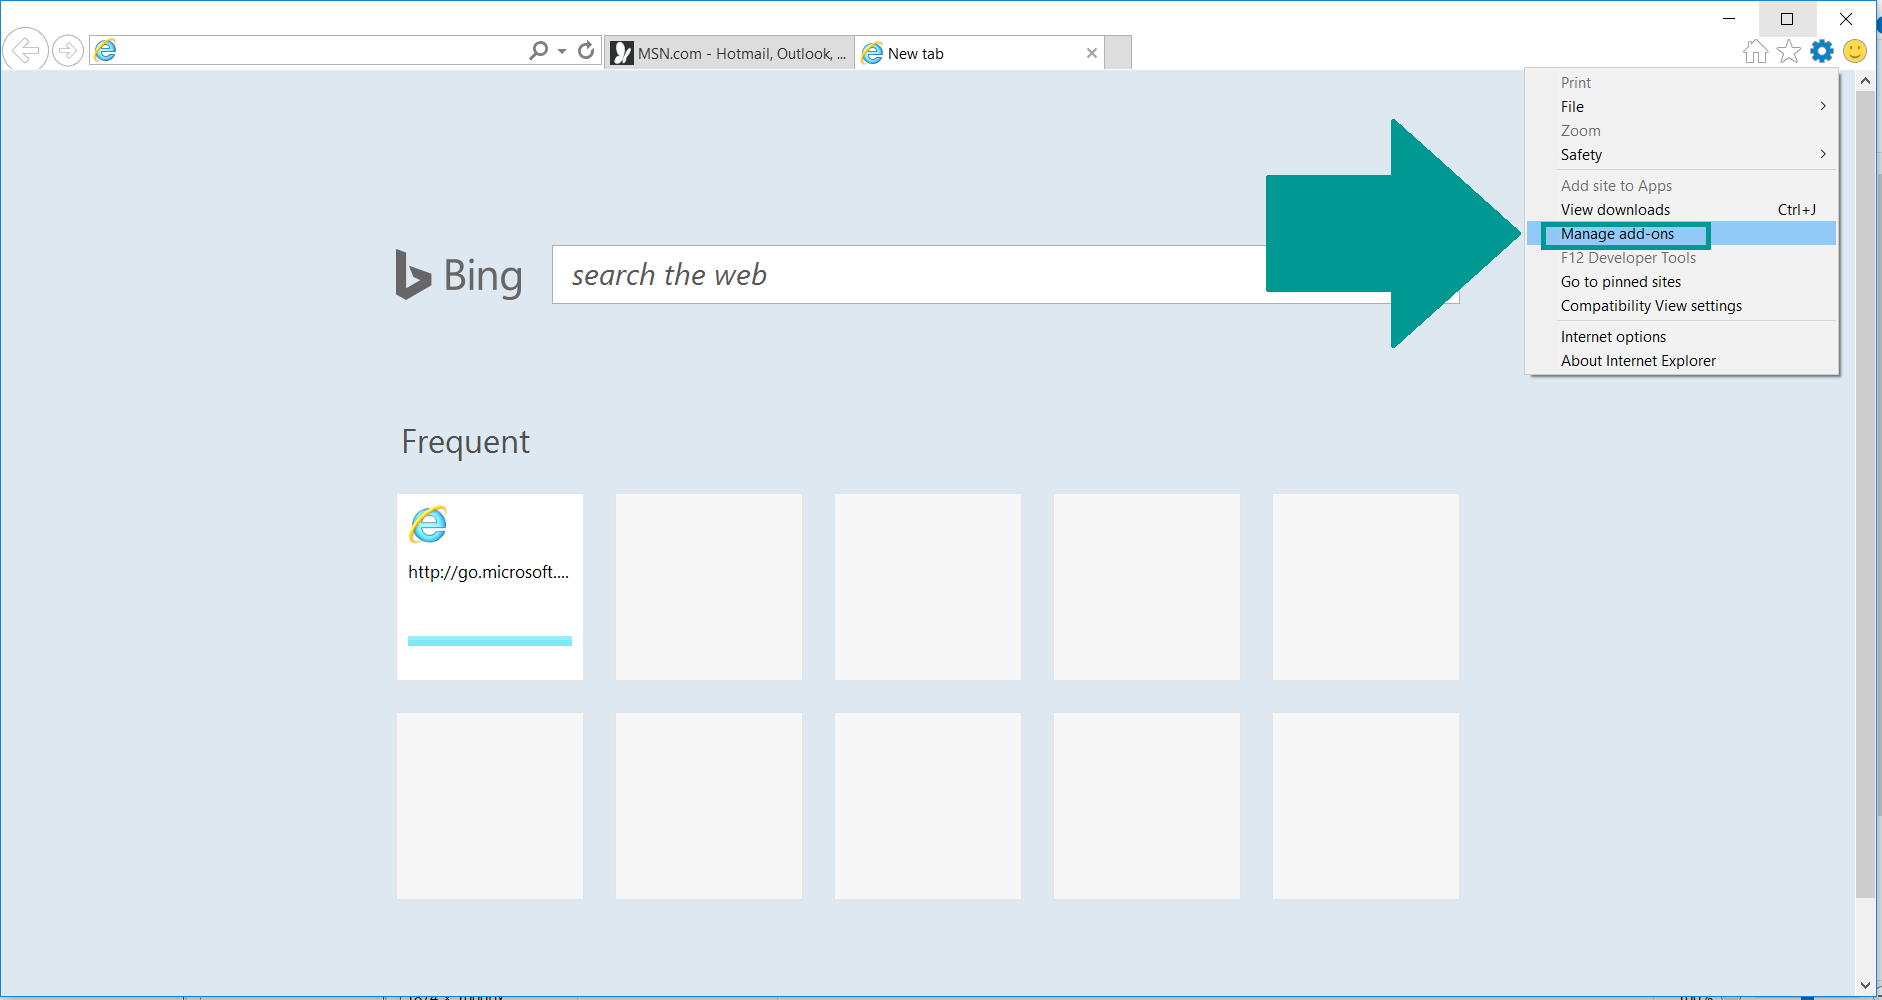
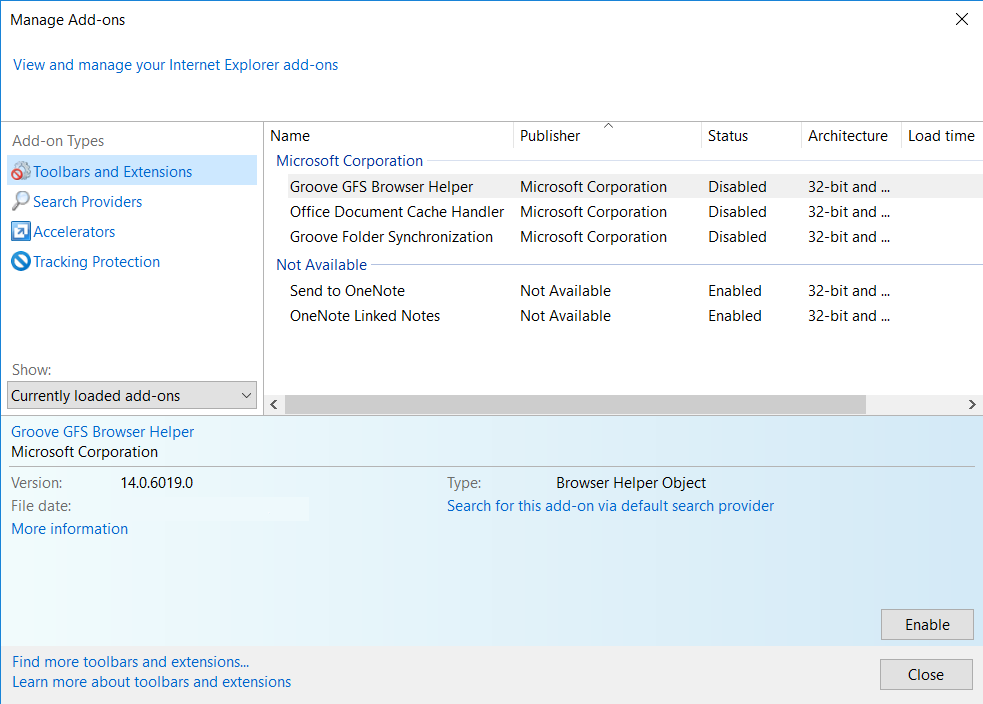
2. In the “Manage add-ons” window, bellow “Add-on Types“, select “Toolbars and Extensions“. If you see a suspicious toolbar, select it and click “Remove“.
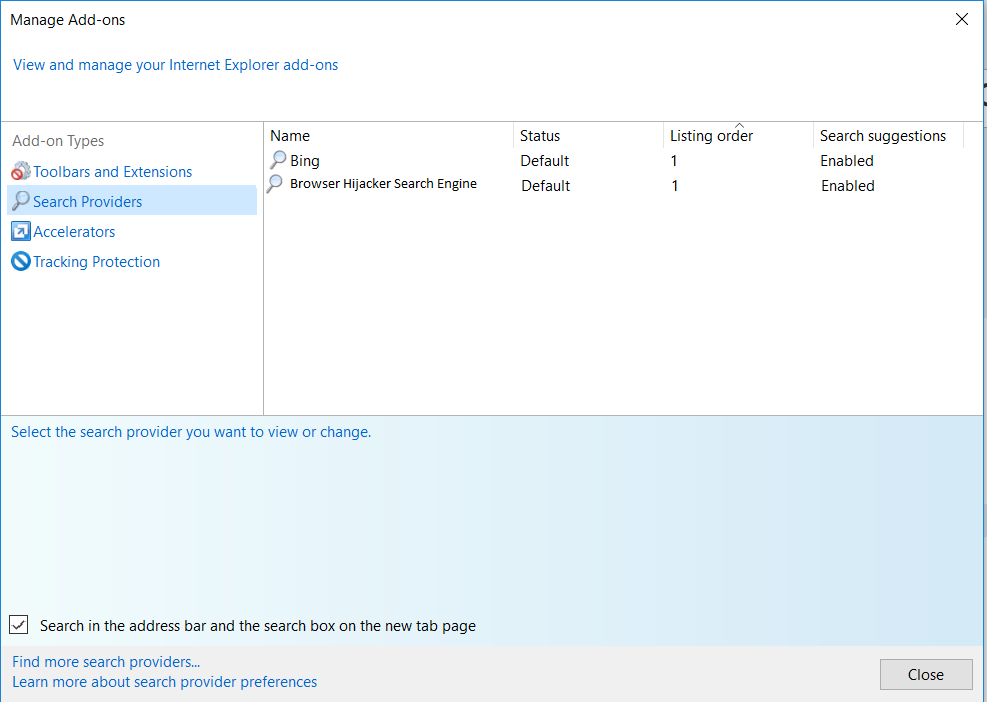
3. Then again in the “Manage Add-ons” window, in “Add-on Types“, Select “Search Providers“. Chose a search engine and click “Set as default“. Select the unknown search engine and click “Remove and Close”.
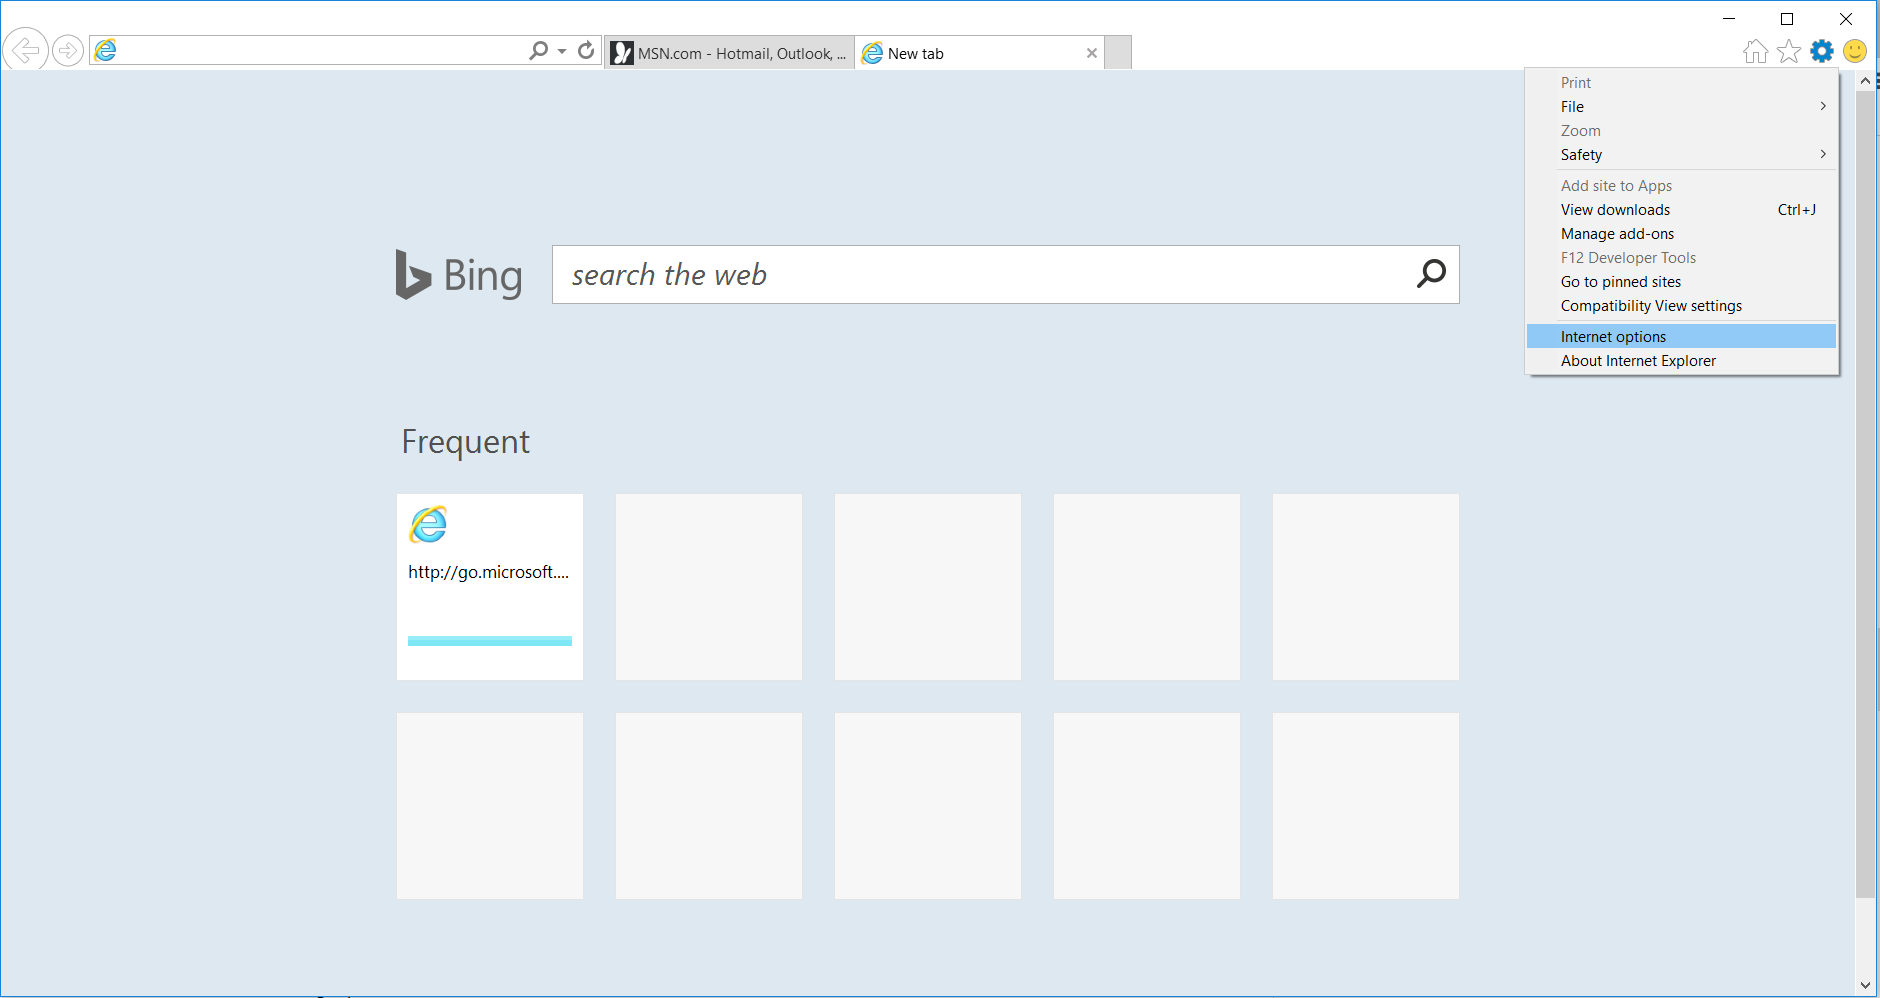
4. Open the Tools menu, select “Internet Options”.
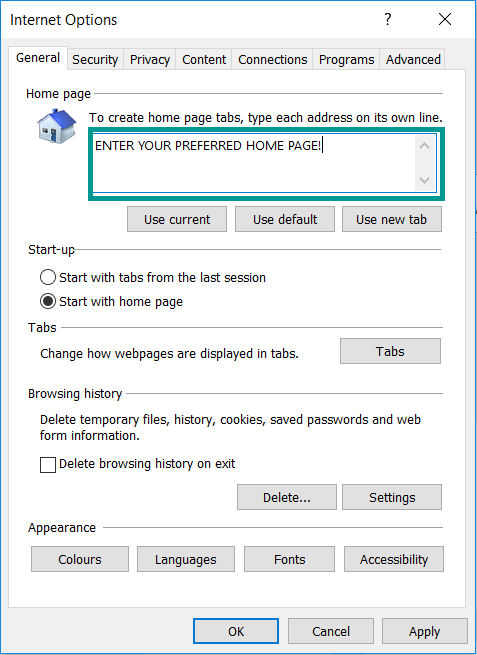
5. In the “General” tab, in “Home page”, enter your preferred page. Click “Apply” and “OK”.
Repair Windows Registry
1. Again type simultaneously the WIN Key + R key combination
2. In the box, write regedit and hit Enter
3. Type the CTRL+ F and then write the malicious name in the search type field to locate the malicious executable
4. In case you have discovered registry keys and values related to the name, you should delete them, but be careful not to delete legitimate keys
Click for more information about Windows Registry and further repair help