


Creating backups of your sensitive data is important when working with security risks: Internet downloads from untrusted locations, browsing public networks with open shares and other related scenarios. Creating copies of your data with enhanced control and functionality is not available in the built-in backup solution provided with most Microsoft Windows operating systems. This is why users often use software products from various vendors that provide the extra comfort and security.
Most solutions cost money and not everyone can pay their (in most cases) high price so we would like to present an open-source solution – Areca Backup. The program has a feature-rich and easy to use graphical user interface and works with both Microsoft Windows and Gnu/Linux distributions.
Areca Backup Features
Areca Backup is complete feature-rich open source application that is able to create and manage backup copies of sensitive user data. The program has been made to be easy to use by users of all experience levels. Areca can utilize advanced features to create versatile backups depending on the case scenario.
Areca Backup has the following engine features:
- Compression of the backup archives using the ZIP and ZIP64 formats
- Encryption of the backup archives with AES 128 and AES 256 encryption algorithms
- Backup storage on local disk drives, network shares, removable devices (USB flash drives and external drives) and remote FTP, FTP with implicit or explicit TLS/SSL modes and SFTP
- Filtration of source file input by extension, subdirectory, regular expression, size, date, status, with AND/OR/NOT logical operators
- Support for incremental, differential and full backup creation
- Archive merging option that allows contiguous archives to be fused into a single file to save storage space
- Data recovery of specific archives or files of specific dates
- All critical mechanisms are transactional to guarantee backup integrity
- Backup reporting on local disk or via email
- Post backup shell scripting support
- Storage and recovery of file permission, symbolic links and named pipes
Areca’s graphical user interface (GUI) is structured around the content explorer paradigm, making it easy to use for any user. Each archive is assigned a manifest description that contains information such as title, date, description and additional data. The program allows file version revisioning that keeps track of any changes made to the individual files and folders housed within the backup. Each version can be viewed and recovered. User history is also kept. Areca comes with a command-line interface as well which can be used for automation. Extensive plugin support is also available.
How To Install Areca Backup on Microsoft Windows
Use these short instructions to obtain your own copy of the program and install it on your home or business computer.
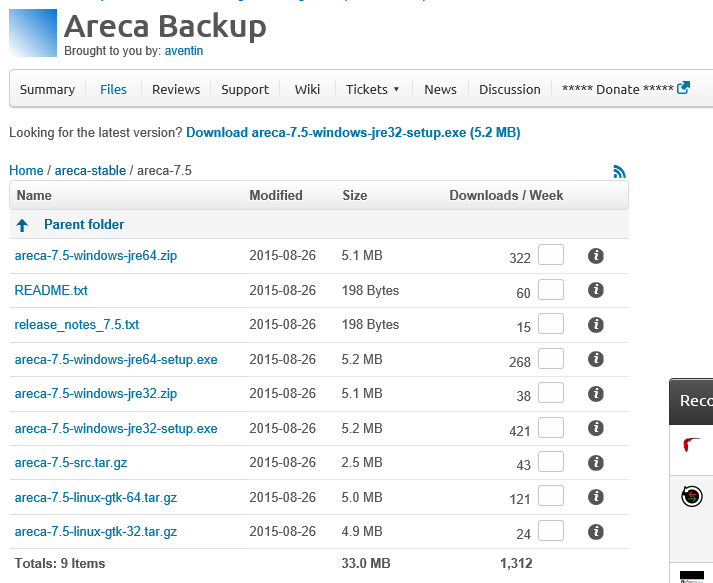
- Navigate to the official website of Areca
- Browse to the latest stable version. At the time of writing this is areca-7.5 and download the Windows installation file. The 32-bit version is areca-7.5-windows-jre32-setup.exe and areca-7.5-windows-jre64-setup.exe for 64-bit systems
- Execute the installation file when the download is complete and follow the prompts. The installation process is pretty straight forward
- Double click on the shortcut on the system desktop or in the start menu to start the application
How To Install Areca Backup on Gnu/Linux Distributions
- Navigate to the official website of Areca
- Browse to the latest stable version. At the time of writing this is Areca version 7.5 and download the GTK installation file. The 32-bit version is areca-7.5-linux-gtk-32.tar.gz and areca-7.5-linux-gtk-64.tar.gz for 64-bit systems
- Unzip the contents to a designated folder
- To make Areca executable run these commands in a terminal: chmod a+x areca.sh check_version.sh; chmod a+x -v bin/*
- To launch the application use ./areca.sh for the graphical user interface or .bin/run_tui.exe for the command-line interface
How To Use Areca Backup
Upon successful initiation the program will start and the main window appears.
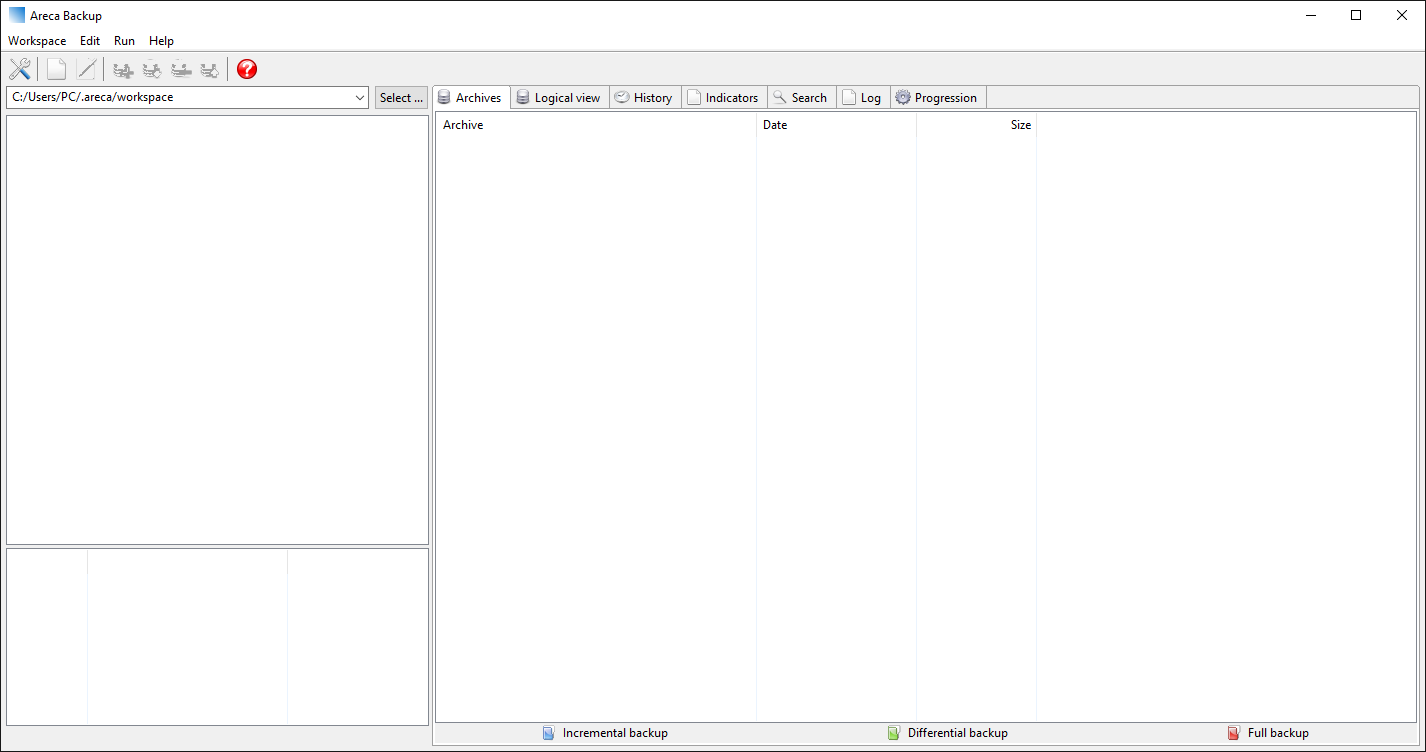
The screen is divided into several sections by default:
- The top menu which houses the menus and icons
- The left file explorer window which is used for file navigation
- The right section which is used to view the information about the selected backup.
As you can see we have not yet created a backup archive, so let’s try that now.
Before we can begin backing up data we need to designate a target location. Right click in the left section where the file explorer list is located and choose the New Target button.

From this window you can type in the name and the location of your backups. You may opt between a local repository, preferably the internal hard drive. Other options include FTP/sFTP and SFTP locations for remote backups.

The archive names can be modified by modifying the default naming formula using the wildcard prefixes. The storage mode selects the appropriate type that you wish to enable.
- Standard – This is the default mode that creates a full backup archive of all selected data. All new or modified files since the last backup will be stored in the archive
- Delta – A new archive will be created for each backup. Only the modified parts of the files are stored in these types of backups. The delta mode is useful for handling larger files as it saves a lot of storage space.
- Image – This storage mode creates a unique archive that is created and updated at each backup.
For the purpose of this demonstration we are going to make a backup of the Saved Pictures folder in our user directory. Click on the Sources tab to select the folder location. Click the Add button and navigate to the selected folder. You can also use the drag and drop feature to directly place files and folders from your desktop or file explorer.
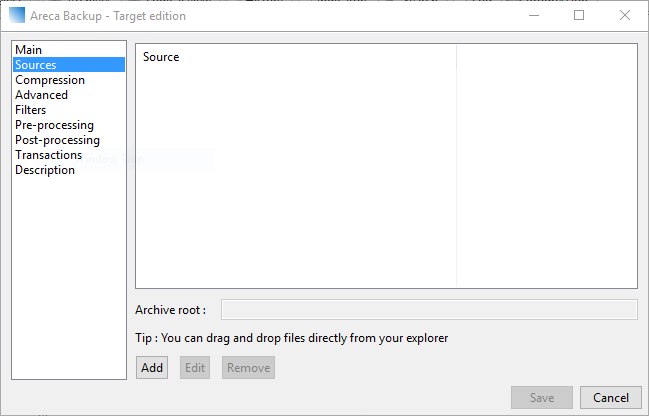
You can place both files and/or folders by selecting the relevant buttons. Click on the Save button when you are ready to continue.

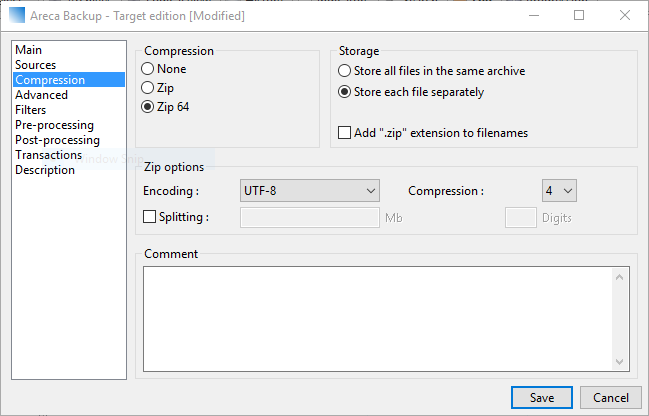
Open the Compression tab on the left to select it. Here we can choose the compression algorithm that is going to be used for the backups. You may opt to enable the Splitting function by ticking the checkbox and entering a preferred size. This is useful if you are considering making backup copies on removable media such as CD and DVD discs.
Another useful feature can be found in the Advanced tab. Here you can enable Encryption by selecting the checkbox. Choose an algorithm and a cryptographic key. The application has a handy password generator that you can use by clicking the Generate button.
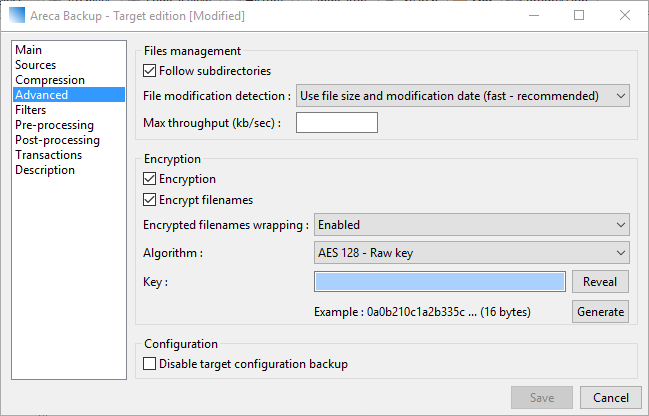
Click the Save button when you are ready to continue.
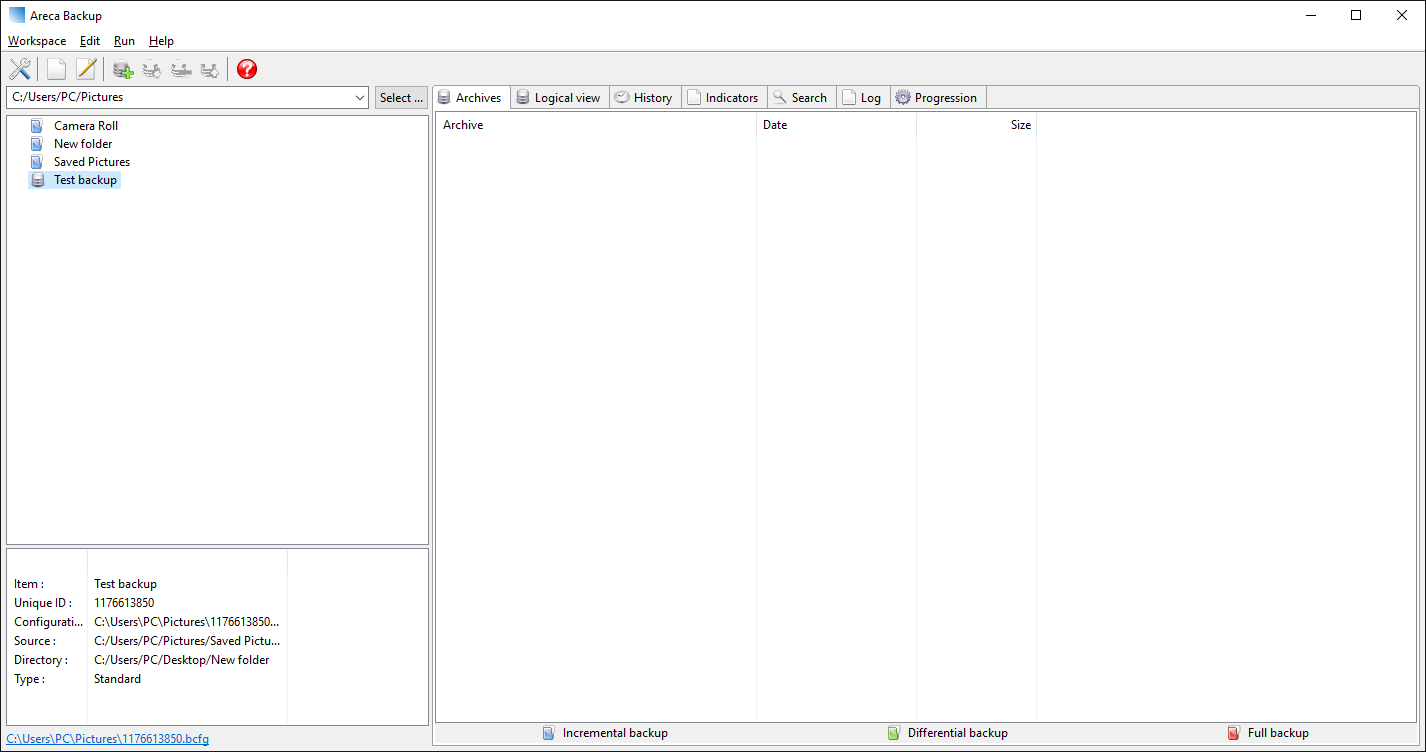
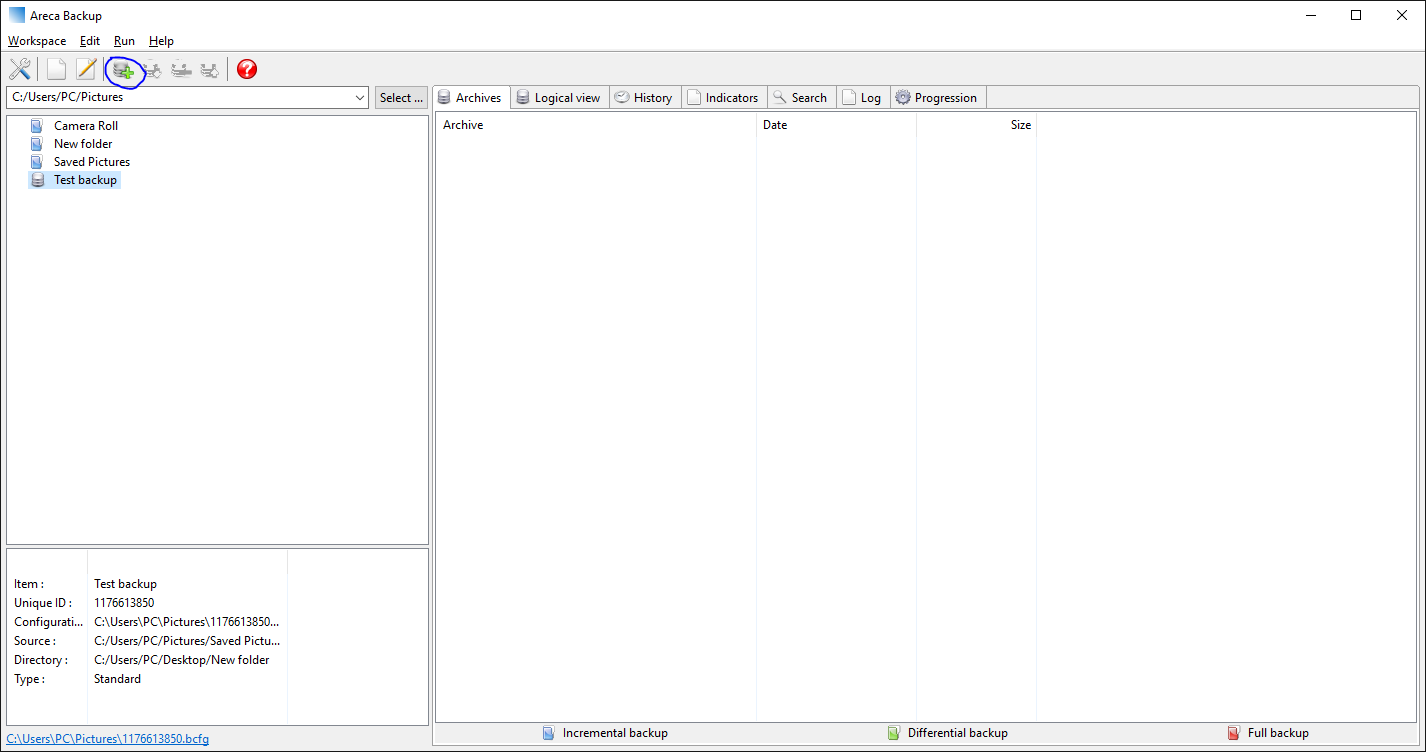
The main window is visible once again with our Test backup archive selected.
Click on the Launch a backup process to start the engine.
Choose the type of backup and add an optional manifest. The three backup types are:
- Full Backup : When a full backup is performed, ALL files are stored in your archive (whether they have been modified or not).
- Incremental Backup : When an incremental backup is performed, only the files which have been modified since the last backup are stored in your archive.
- Differential Backup : When a differential backup is performed, only the files which have been modified since the last FULL backup are stored in your archive.
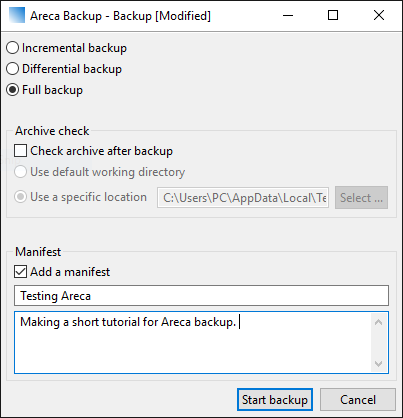
When you are happy with the settings press the Start backup button. Depending on the size and your computer’s performance the backup time will vary.
Once complete your backup will appear in the right side of the screen. You can double click on its name to see some detailed information.
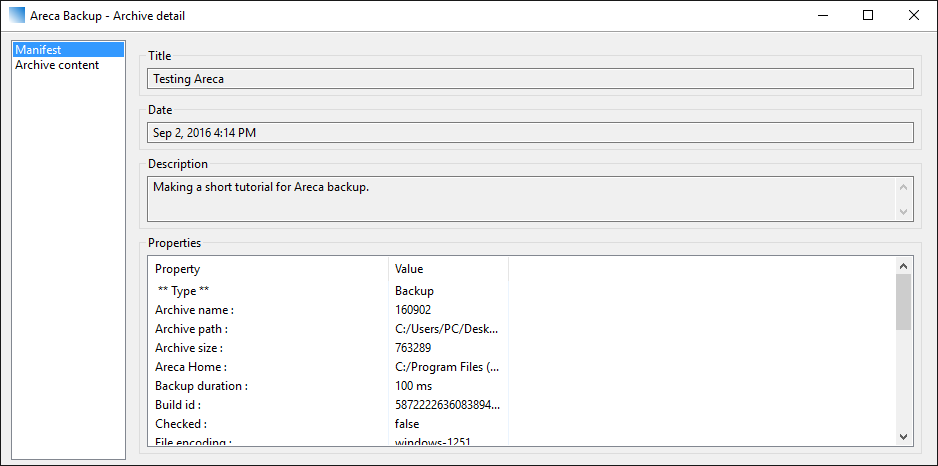
Two archive details screen is divided in two tabs – Manifest and Archive content.
The Manifest screen shows system configuration values, the title, date of creation and the description. The Archive content screen showcases the all files and folders that are placed in the backup.
Close the details screen to access the other tabs.
- Logical view – Displays the contents of the backup. On the right side the users can view the file history and revert to previous changes. The manifest description is located below.
- History – The history of the backup itself is shown.
- Indicators – Various information about the backup file is located here such as the physical size ratio, the filesize with and without history and other variables.
- Search – The users can search for specific files or folders within the archive. Selectable options include case sensitive search and regular expressions filtering.
- Log – Shows a detailed view of the backup creation and modification.
- Progression – Here the reporting options can be viewed in further detail.
These are the basics that will get you started with Areca Backup. Thank you for taking the time to read this tutorial, we hope that you may find it useful. If you have any comments or questions feel to drop us a comment in the section below.