


A ransomware virus using the .stn file extension and 0_HELP_DECRYPT_FILES.htm ransom note, known as Satan ransomware’s new version has been detected out in the wild. The virus may use a combination of AES and RSA encryption algorithms to encode the files on the infected computers. Satan 2 ransomware also performs multiple other malicious activities and after the encryption process is complete, drops it’s ransom note. In it, the victim, whose computer is infected Is requested to pay a hefty ransom fee (1 BTC) which doubles in 24 hours if not paid. Keep reading this article to learn more information about how to remove Satan 2 ransomware and try to restore .stn encrypted vfiles.
Satan 2 Ransomware – Description
The purpose of Satan 2 ransomware is to encrypt the files on the infected computers by it. The virus drops multiple malicious files when it infects a machine. The files consist primarily of:
The virus’ ransom note, called 0_HELP_DECRYPT_FILES.html.
The virus files which may be more than one executable with the following names (ransomware.exe, ransomware3.exe, ransom.exe)
Other support files known as modules (.dll, .tmp, .exe, .bat, .vbs)
The files may be located in multiple different Windows directories, including the following:
- %System32$
- %AppData%
- %Local%
- %LocalLow%
After the files are dropped, the Satan 2 virus may interfere with multiple different Windows components, to perform malicious activities. One of those is to delete the shadow volume copies on the computers infected by it. These shadow copies are a form of backup and Satan 2 makes sure they are gone so that the files it later encrypts can no longer be resotred this way. This is achieavable by executing the following Windows command without the victim noticing:
vssadmin.exe delete shadows /all /quiet
In addition to this activity, Satan 2 ransomware may also heavily interfere with Windows processes and registry sub-keys, more particularly the Run and RunOnce keys. In these keys, custom Windows registry values may be created that aim to run the malicious executables of the .stn file virus when Windows boots up. The registry sub-keys are the following:
- HKEY_LOCAL_MACHINE\Software\Microsoft\Windows\CurrentVersion\Run
- HKEY_CURRENT_USER\Software\Microsoft\Windows\CurrentVersion\Run
- HKEY_LOCAL_MACHINE\Software\Microsoft\Windows\CurrentVersion\RunOnce
- HKEY_CURRENT_USER\Software\Microsoft\Windows\CurrentVersion\RunOnce
In addition to this activity, the virus is also pre-programmed to scan for a wide database of file types to encrypt. This includes important Documents, Videos, Audio files, Images and others. All of the extensions Satan 2 ransomware is reported to scan for and encrypt are the following:
.incpas, .mp4, .pab, .st6, .sas7bdat, .wmv, .backup, .drf, .ibank, .3ds, .odg, .cer, .tif, .cs, .dotx, .7z, .png, .bak, .ibz, .db3, .pbl, .3fr, .dxf, .nk2, .bkp, .mdf, .svg, .xlm, .3dm, .pct, .java, .pot, .sxi, .ibd, .sxw, .pspimage, .ppt, .kbx, .ppsm, .ndd, .txt, .pdb, .say, .backupdb, .fla, .swf, .asx, .accdt, .mp3, .ycbcra, .erf, .cr2, .pfx, .potx, .qby, .sqlite, .blend, .class, .pat, .odp, .gray, .qbw, .tib, .thm, .htm, .mos, .rm, .key, .std, .tlg, .lua, .pst, .sqlitedb, .grey, .cdr4, .dc2, .ce1, .ps, .tex, .eml, .xlam, .pages, .st8, .jar, .st7, .potm, .sdf, .db-journal, .pcd, .aspx, .rwl, .kpdx, .fmb, .xlr, .gry, .kc2, .oil, .moneywell, .xlk, .sti, .accdr, .oth, .c, .xml, .nd, .mdb, .pem, .erbsql, .bpw, .ffd, .ost, .pptm, .dwg, .zip, .qbm, .cdx, .des, .dng, .pdd, .cfp, .nyf, .cgm, .sldm, .xla, .odf, .raf, .crw, .mef, .raw, .x11, .nsd, .fff, .design, .dcs, .ptx, .al, .ns2, .bik, .back, .accdb, .nwb, .cpi, .ads, .odt, .sqlite3, .docm, .drw, .pl, .nx2, .fpx, .rdb, .otp, .msg, .accde, .agdl, .php, .csv, .py, .rtf, .ach, .sda, .ddd, .asf, .dotm, .cmt, .h, .hbk, .xlsx, .s3db, .tga, .wav, .iif, .dxb, .sql, .db, .sd0, .bgt, .djvu, .jpg, .doc, .craw, .mpg, .sxd, .kdc, .jpeg, .psafe3, .flac, .dtd, .act, .qba, .vob, .cdrw, .eps, .bkf, .mdc, .rar, .mov, .cdf, .m4v, .ab4, .bank, .pps, .cib, .dot, .dgc, .exf, .flv, .xlsb, .ddrw, .adb, .srw, .plc, .csh, .xls, .fxg, .otg, .pas, .xlt, .indd, .rwz, .xltx, .apj, .stw, .xltm, .orf, .ott, .qbb, .max, .cls, .obj, .docx, .dcr, .cdr3, .qbx, .pdf, .nef, .ots, .srt, .ddoc, .rat, .phtml, .m, .dbx, .nxl, .avi, .p12, .awg, .dbf, .ns3, .mmw, .prf, .wallet, .rw2, .jin, .odc, .qbr, .ppsx, .ns4, .wpd, .wps, .nsh, .dxg, .fhd, .dac, .wb2, .nrw, .odb, .ait, .jpe, .odm, .sldx, .fdb, .acr, .war, .oab, .sxc, .cpp, .r3d, .hpp, .asm, .st5, .stx, .xis, .dds, .xlsm, .p7c, .cdr5, .3g2, .mrw, .sr2, .html, .cdr, .idx, .st4, .bdb, .kdbx, .nsg, .der, .ods, .myd, .nop, .ppam, .pptx, .yuv, .xlw, .mfw, .nsf, .csl, .php5, .p7b, .crt, .asp, .srf, .jsp, .cdr6, .sxm, .iiq, .3gp, .ce2, .arw, .bay, .ai, .sxg, .psd, .3pr, .fh, .pef, .x3f, .sik, .bpp, .vmdk, .spi, .bup, .cvt, .bb, .fkc, .tjl, .dbk, .swp, .fb, .vib, .dtb, .bke, .old, .bkc, .jou, .rpb, .abk, .sav, .bkn, .tbk, .fbw, .vrb, .spf, .bk, .sbk, .umb, .ac, .vbk, .wbk, .mbk
The encryption process of Satan 2 ransomware is conducted with the aid of the AES and RSA encryption algorithms. The AES cipher is used to replace blocks of data of the original files with it’s cipher code, which denies access to the files, making them seem corrupt. Then a unique public key is generated for each file by the RSA encryption algorithm. It is also added to the encrypted files. The decryption key which is also generated is sent to the servers of the cyber-criminals. After the process has completed, the files are added the .stn file expansion, making them appear similar to the example below.
New Microsoft Word Document.doc.stn
After the encryption process has completed, Satan 2 ransomware also sets it’s ransom note visible so that the user can open it and see the demands of the virus, which are the following:
“As said before, your files have been encrypted, in order to decrypt them, you’ll need the private key of the key pair that was generated when your files were encrypted. Decrypting your files is only possible with the private key and the decrypter.
To get the decryptеr you should:
pay for decrypt:
to send 1 bitcoin today (tomorrow 2 bitcoins) to bitcoin the address 1Nez7W9ashFL4BA7vHuA5aoaad9XtqHKCF”
Satan 2 Ransomware – Distribution
The distribution of infection files by Satan 2 ransomware is conducted via multiple different ways, the main of which is uploading malicious files as e-mail attachments. These spammed e-mails usually contain convincing statements that aim to get inexperienced users to open the attachments, portraying them as legitimate documents.
Besides these methods there are also other tools that are used to cause an infection by the Satan 2 ransomware, which are related to fake installers, game cracks, patches as well as other tools and fake programs uploaded on shady websites.
Satan 2 Ransomware – Summary and How to Remove It
For the removal of Satan 2 ransomware, we advise you to follow the removal instructions which we have posted on the removal manual below. They are specifically designed to help you get rid of this ransomware virus methodologically. In case removing the virus yourself may present difficulties, experts always advise using an advanced anti-malware program which is designed to remove threats like Satan 2 ransomware. Using such tool will also make sure your computer is protected against future infections as well.
Summary of Satan 2 Ransomware
| Name | Satan 2 Ransomware |
| File Extension | .stn |
| Ransom | 1.00 BTC |
| Easy Solution | You can skip all steps and remove Satan 2 ransomware with the help of an anti-malware tool. |
| Manual Solution | Satan 2 ransomware can be removed manually, though it can be very hard for most home users. See the detailed tutorial below. |
| Distribution | Spam emails, malicious URLs, malicious attacments, exploit kits, freeware. |
Satan 2 Ransomware Removal
STEP I: Start the PC in Safe Mode with Network
This will isolate all files and objects created by the ransomware so they will be removed efficiently.
- 1) Hit WIN Key + R

- 2) A Run window will appear. In it, write “msconfig” and then press Enter
3) A Configuration box shall appear. In it Choose the tab named “Boot”
4) Mark “Safe Boot” option and then go to “Network” under it to tick it too
5) Apply -> OK
Or check our video guide – “How to start PC in Safe Mode with Networking”
STEP II: Show Hidden Files
- 1) Open My Computer/This PC
2) Windows 7
- – Click on “Organize” button
– Select “Folder and search options”
– Select the “View” tab
– Go under “Hidden files and folders” and mark “Show hidden files and folders” option
3) Windows 8/ 10
- – Open “View” tab
– Mark “Hidden items” option

4) Click “Apply” and then “OK” button
STEP III: Enter Windows Task Manager and Stop Malicious Processes
- 1) Hit the following key combination: CTRL+SHIFT+ESC
2) Get over to “Processes”
3) When you find suspicious process right click on it and select “Open File Location”
4) Go back to Task Manager and end the malicious process. Right click on it again and choose “End Process”
5) Next you should go folder where the malicious file is located and delete it
STEP IV: Remove Completely Satan 2 Ransomware Using SpyHunter Anti-Malware Tool
SpyHunter anti-malware tool will diagnose all current threats on the computer. By purchasing the full version, you will be able to remove all malware threats instantly. Additional information about SpyHunter / Help to uninstall SpyHunter
STEP V: Repair Windows Registry
- 1) Again type simultaneously the Windows Button + R key combination
2) In the box, write “regedit”(without the inverted commas) and hit Enter
3) Type the CTRL+F and then write the malicious name in the search type field to locate the malicious executable
4) In case you have discovered registry keys and values related to the name, you should delete them, but be careful not to delete legitimate keys
Further help for Windows Registry repair
STEP VI: Recover Encrypted Files
- 1) Use present backups
- 2) Use professional data recovery software
- – Stellar Phoenix Data Recovery – a specialist tool that can restore partitions, data, documents, photos, and 300 more file types lost during various types of incidents and corruption.
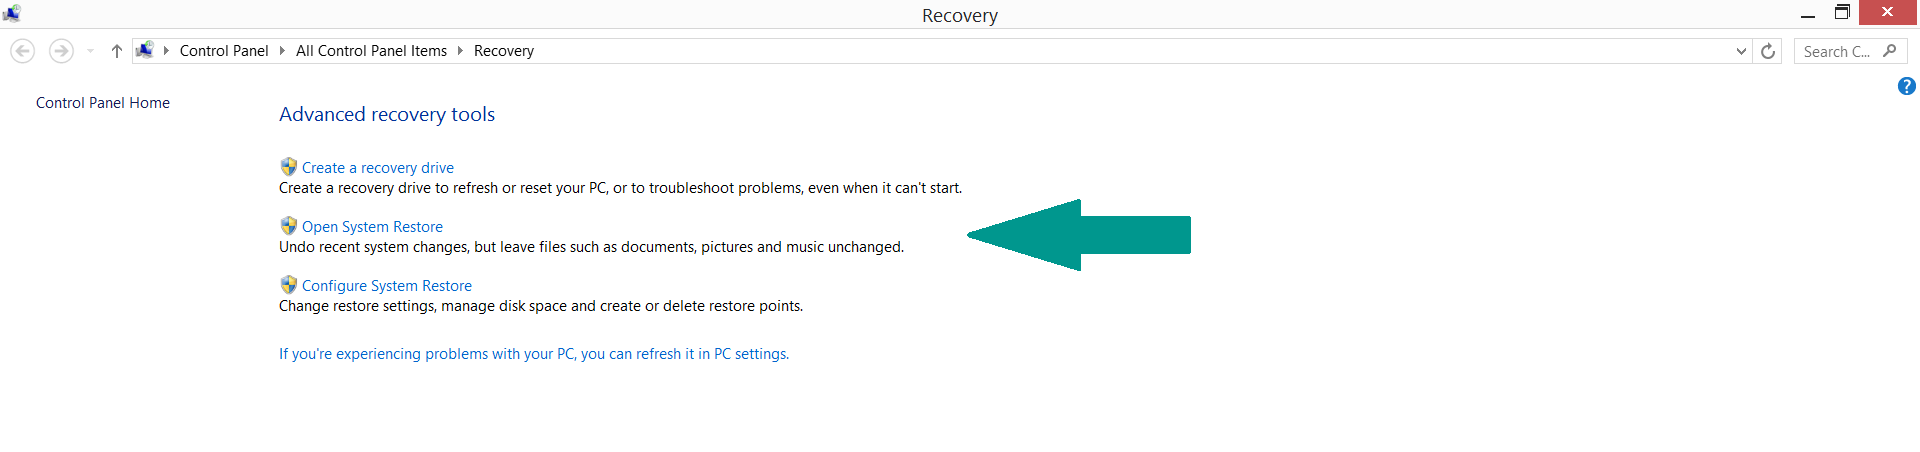
- 3) Using System Restore Point
- – Hit WIN Key
– Select “Open System Restore” and follow the steps
- 4) Restore your personal files using File History
- – Hit WIN Key
– Type “restore your files” in the search box
– Select “Restore your files with File History”
– Choose a folder or type the name of the file in the search bar
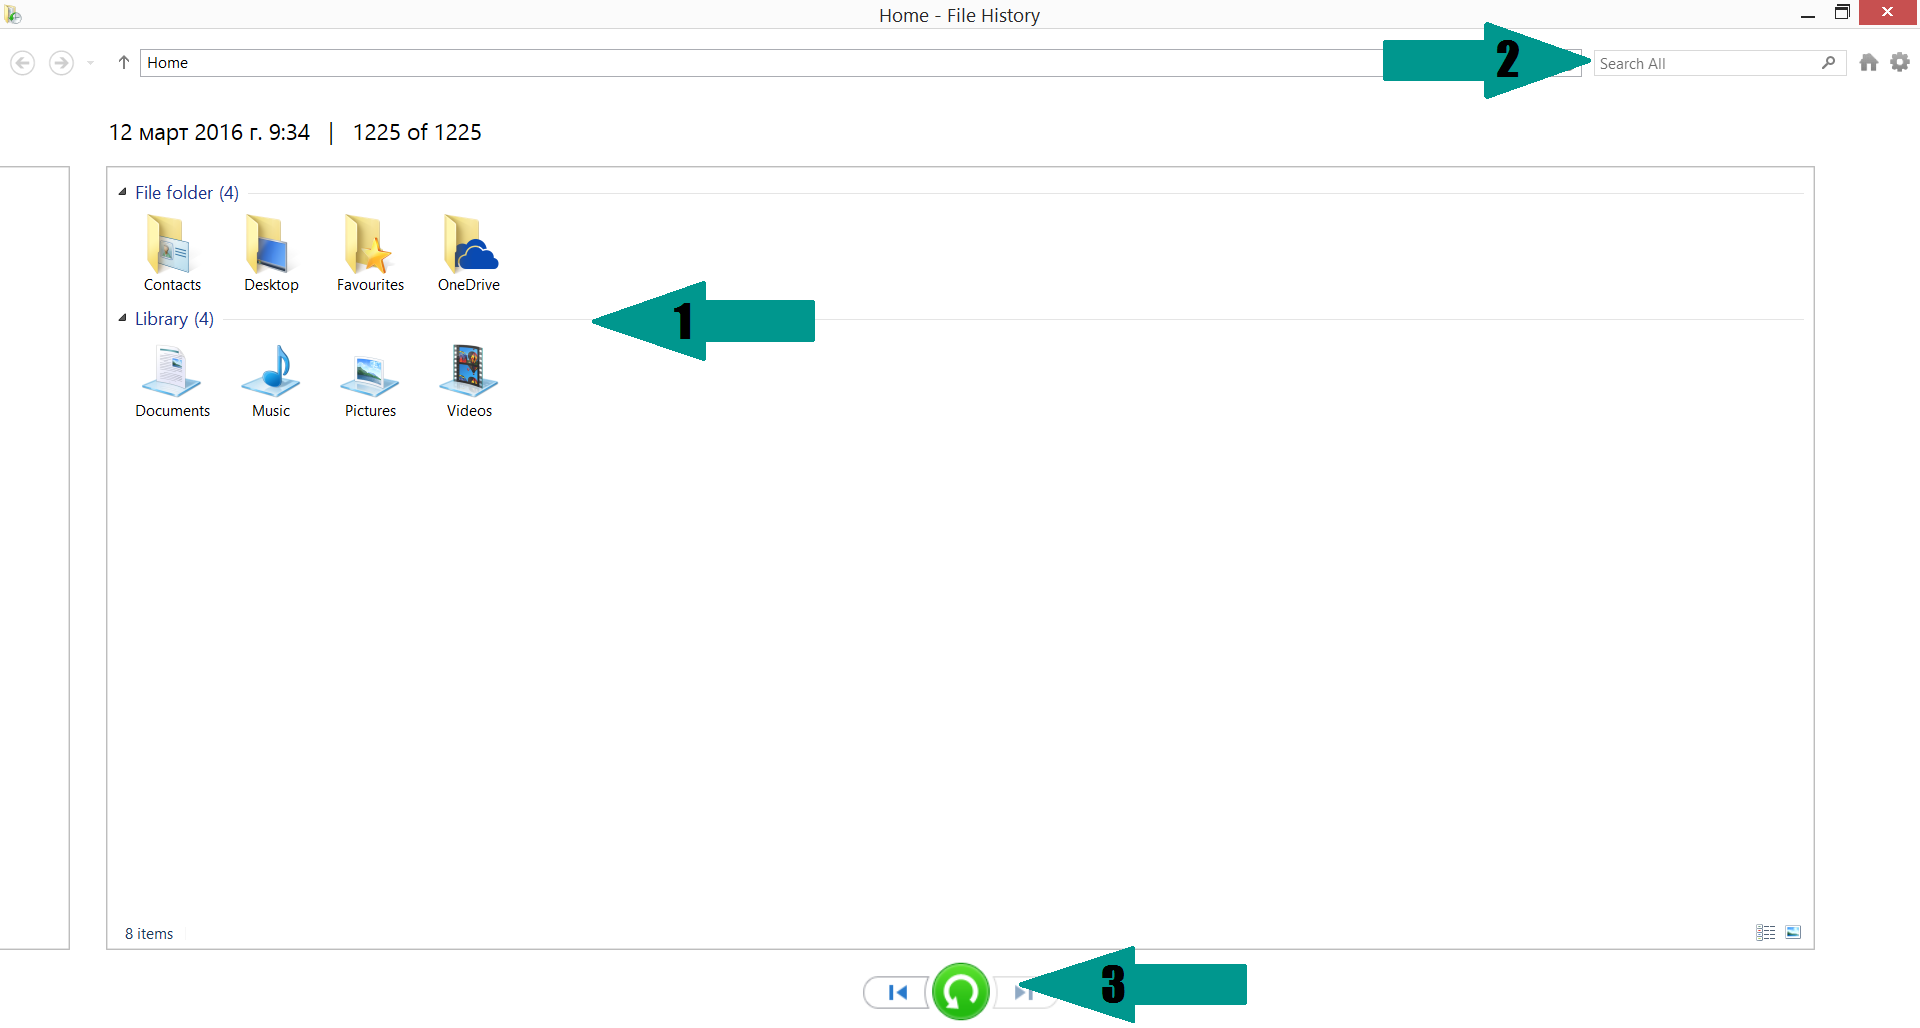
- – Hit the “Restore” button
STEP VII: Preventive Security Measures
- 1) Enable and properly configure your Firewall.
2) Install and maintain reliable anti-malware software.
3) Secure your web browser.
4) Check regularly for available software updates and apply them.
5) Disable macros in Office documents.
6) Use strong passwords.
7) Don’t open attachments or click on links unless you’re certain they’re safe.
8) Backup regularly your data.
SpyHunter anti-malware tool will diagnose all current threats on the computer. By purchasing the full version, you will be able to remove all malware threats instantly. Additional information about SpyHunter / Help to uninstall SpyHunter